|
|||||||
| Home | Forum | Online Store | Information | LJ Webcam | Gallery | Register | FAQ | Community | Calendar | Today's Posts | Search |
 |
|
|
Thread Tools | Display Modes |
 01-19-2015, 02:07 PM
|
#1 |
|
Senior Member
Join Date: Dec 2012
Posts: 516
|
Mirage Drive GT Upgrade
One thing to note before you open up your parts. Do not remove the tape and "ear" plugs from the parts. The needles bearings will fall out, and you will have a mess on your hands. Just use the SS shafts to push out the pugs when putting the parts back together. Grease the "Needle Bearings" with marine grade grease by dropping the "needles out" and dipping in marine grease. Place back in the housing, the grease will hold it in place until you put the shafts in. 1: Remove Cables, Idler and Sprocket. I labeled mine, front, rear and idler. 2: Pull off Peddles from main shaft. 3: Clean main shaft with fine steel wool 4: Remove Peddles from Cam (9/16th) 5: Bolt New GT Cam to existing pedal 6: Remove Idler Pulley, clean shaft with steel wool and install GT Pulley use hex wrench to back pin out, pull shaft, clean, install reverse order. Remove needles bearings and dip in marine grease. Put back in, the grease will keep it in place. 7: Remove Cotter Pins from turbo fin masts, and slide fins off. 8: Loosen Hex set screw on Main shaft, and push shaft out with screw driver or appropriate tool or said liking. 9: Remove Masts from sprocket with crescent wrench or small open end wrench 10: Line up new GT sprocket, do not remove tape, push in the drive main shaft and allow it to push out the "ear" plug, then remove tape as shaft is pushing the plug out. Do the same for the second shaft. Make sure to line up the flat portion of the drive main shaft (center area) with the hex set screw. Once the shaft is centered, tighten set screw. 11: Using thread locker put the mast back in the sprockets. Slide on fins and put cotter pins back. 12: Now you are ready to put the cams/pedals back on the main shaft. Remove the plastic ring that is holding the needle bearings in, (it tears off), then line up the main shaft and slide it onto the sprocket. The plastic guide/retainer will back out, keeping the needle bearings in place. Do not allow the sprocket to slide off the main shaft or you will have needle bearings all over the place. Do this to both sides, then use a zip tie to bind them together. 13: Put the idler cable back on first, lining up the fins in the bottom center position. Then put the sprocket cables back on and tighten up. Now you have an Upgraded GT Mirage drive with needle bearings rather than bushings. Last edited by Lipripper92592; 01-19-2015 at 07:20 PM. Reason: Need to grease the needle bearings |

|

|
|
01-19-2015, 02:08 PM
|
#2 |
|
Senior Member
Join Date: Dec 2012
Posts: 516
|
Finished Product
The rest of the pictures as I'm limited to 10 pictures per post.
|
|
|
|
|
01-19-2015, 02:28 PM
|
#3 |
|
Senior Member

Join Date: Aug 2011
Location: West Covina, CA
Posts: 434
|
 Awesome write up and DIY instruction dude. Awesome write up and DIY instruction dude.
|
|
|
|
|
01-19-2015, 02:37 PM
|
#4 |
|
Brandon
Join Date: Jul 2011
Location: San Diego
Posts: 2,345
|
Very nice write up. I will be using this in a few days for my drive.

|
|
|
|
|
01-19-2015, 02:42 PM
|
#5 |
|
Senior Member

Join Date: Aug 2012
Location: San Diego
Posts: 421
|
Nice write up brother
do you mind if I put a link to it on the forum i'm on in FL? Thanks |
|
|
|
|
01-19-2015, 02:44 PM
|
#6 |
|
Administrator

Join Date: Mar 2005
Location: 1-2 miles off the point
Posts: 6,943
|
First off thanks for taking the time to post this up!
Augh! after talking to you on the phone I tore one of the factory built ones from a showroom kayak apart and they are using marine grease in conjunction with the roller bearings. On the older ones it was obvious as you could see grease seeping out of the exposed edges, they must be using less as I could not see any at all Sorry, but you need to grease em!
__________________
 
|
|
|
|
|
01-19-2015, 03:01 PM
|
#7 | |
|
Senior Member
Join Date: Dec 2012
Posts: 516
|
Yes
Quote:
|
|
|
|
|
|
01-19-2015, 03:03 PM
|
#8 | |
|
Senior Member
Join Date: Dec 2012
Posts: 516
|
Update to add marine grease
Quote:
|
|
|
|
|
|
01-19-2015, 03:58 PM
|
#9 |
|
Administrator
Join Date: Mar 2005
Location: 1-2 miles off the point
Posts: 6,943
|
apply the grease to the axles and slide the pulley, sprockets and drums over the greased axles.
__________________
|
|
|
|
|
01-19-2015, 07:14 PM
|
#10 |
|
Senior Member
Join Date: Dec 2012
Posts: 516
|
Packing the bearings with marine grease
Below is a picture of how to pack the bearings.
Pull out the needle bearings, they feel like carbon rods. Dip them in marine grease one by one, and stack them against the wall, down to the flange. The grease will keep them in place until you slide the shaft in. The image is of the idler and has three more "needles" to be put in. |
|
|
|
|
01-19-2015, 08:08 PM
|
#11 |
|
Administrator
Join Date: Mar 2005
Location: 1-2 miles off the point
Posts: 6,943
|
I will just send all my rebuilds to you
__________________
|
|
|
|
|
01-20-2015, 07:01 AM
|
#12 |
|
Senior Member

Join Date: Mar 2009
Location: Menifee
Posts: 2,509
|
This is great!
 Thanks! Thanks!
__________________
”The beauty of the Second Amendment is that it will not be needed until they try to take it.” ~Thomas Jefferson.........maybe
|
|
|
|
|
01-24-2015, 07:24 PM
|
#13 |
|
Brandon
Join Date: Jul 2011
Location: San Diego
Posts: 2,345
|
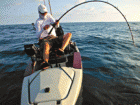
Built my GT drive today. A couple things that were a PITA were the needle bearings in the sprockets due to their length. I ended up pulling every pin from every bearing to fill will some marine grease. Actually wasn't as bad as I thought it would be. The chains fought me for a bit too. This was my first time doing anything to a mirage drive and I felt it was time to learn what I'm using. Thank you LIPRIPPER for the write up. Followed it and it worked to a tee. And thank you ICEMAN and OEX Sb for the parts. Will follow up once tested on water.
ImageUploadedByTapatalk1422159892.320234.jpg |
|
|
|
|
01-25-2015, 08:13 AM
|
#14 |
|
Senior Member
Join Date: Dec 2012
Posts: 516
|
I too found the chains to be tricky the first time, and the center cog, a PIA. But here is what I ended up doing.
Fold the chain in half, use a sharpie to mark both sides of that center link. Put the chain in, and press the marked link on the "square" cog. The square cog is the center one on the sprocket. The rest of the links should easily lay down. And yes there are a few "needles"
|
|
|
|
|
01-25-2015, 08:48 AM
|
#15 |
|
Brandon
Join Date: Jul 2011
Location: San Diego
Posts: 2,345
|
Thank you. I did notice that the center tooth on sprocket is square. It is easy to tell which link goes in that tooth because there are only 7 total links. The problem I was running into is that the links did not want to seat all the way down on the new sprocket. Once I started to tighten everything back up, it finally pulled the links onto the teeth correctly.
|
|
|
|
|
01-26-2015, 04:10 PM
|
#16 | |
|
Administrator
Join Date: Mar 2005
Location: 1-2 miles off the point
Posts: 6,943
|
Quote:
__________________
|
|
|
|
|
|
01-26-2015, 05:29 PM
|
#17 |
|
Made in U.S.A.

Join Date: Oct 2012
Location: Dana Point
Posts: 1,625
|
It looks like you are replacing the sprockets and retaining the old chain? Mechanically speaking, it's usually not a good idea to replace sprockets without new chains to go with it. An old (stretched) chain will cause unusual wear on a new sprocket. A new chain on an old (worn) sprocket will decrease the life of the chain. I'm not sure how much wear is involved in the Hobie parts, but it's something to think about at least.
__________________
Hobie PA 14 ¸.·´¯`·.´¯`·.¸¸.·´¯`·.¸><(((º> Jackson Kraken ¸.·´¯`·.¸.·´¯`·.´¯`·.¸¸.·´¯`·.¸><(((º> Malibu X-Factor ¸.·´¯`·.´¯`·.¸¸.·´¯`·.¸><(((º> Malibu Stealth-12 ¸.·´¯`·.´¯`·.¸¸.·´¯`·.¸><(((º> Its not a spelling B its a fishing B  ~yakjoe ~yakjoe
|
|
|
|
|
01-26-2015, 07:25 PM
|
#18 |
|
Senior Member
Join Date: Mar 2011
Location: Nor Cal...30 min from Bodega/Tomales Bay, 1hr from Clear Lake, 2+ hr to Berryessa & the Delta
Posts: 729
|
First off, thanks to LipRipper and all that contributed their time and energy to posting these very detailed instructions and pictures including suggestions and areas in which to expect some difficulty!
I plan on upgrading my old Outback (keeping for friends that don't own kayaks or possibly selling given a proper offer!) mirage drive even though I still plan on buying the 2015 once I start to receive treatments or surgeries (which ever comes first) to improve my mobility. After watching a video from Ful-rac from a Gonzaga trip where he had a "Mirage Drive malfunction", I realized I will need to learn how to repair a Mirage Drive in the field on my own [and I will be keeping a repair kit in my "Kayak Accessories Travel Box", and as Andy won't be just around the corner to fix it for me!  ] and I'm sure this information will be necessary at some time in the future! ] and I'm sure this information will be necessary at some time in the future!FFY 
|
|
|
|
|
01-26-2015, 08:10 PM
|
#19 | |
|
Senior Member
Join Date: Dec 2012
Posts: 516
|
I agree
Quote:
|
|
|
|
|
|
02-03-2015, 06:30 AM
|
#20 |
|
Member

Join Date: Jul 2014
Location: San Diego
Posts: 40
|
Upgraded to Glide Technology. The difference is night and day, and I drive a PA 14.
|
|
|
|
|
|
|


 Linear Mode

