|
|||||||
| Home | Forum | Online Store | Information | LJ Webcam | Gallery | Register | FAQ | Community | Calendar | Today's Posts | Search |
 |
|
|
Thread Tools | Display Modes |
|
|
 06-05-2011, 08:17 PM
|
#1 |
|
Olivenhain Bob

Join Date: May 2008
Location: Olivenhain, CA
Posts: 1,121
|
Good job Jimmy. Your method is similar to the grease mount version that I currently use. The wet mount, while very effective can have some problems, most notably leakage.
If you do not see any loss of performance with the putty, this may be a good find as the putty should be less messy than the grease. My only concern would be what happens as the putty ages and dries out. Please keep us posted. Bob |

|

|
|
06-06-2011, 04:45 AM
|
#2 | |
|
Senior Member

Join Date: Mar 2010
Location: San Diego
Posts: 2,385
|
Quote:
__________________
No better time than being on the water, God Bless, JimmyZ 
|
|
|
|
|
|
06-06-2011, 07:55 AM
|
#3 |
|
Heroes on the Water Staff

Join Date: Mar 2011
Location: Anahiem
Posts: 176
|
I am suprised that putty works. It is mostly clay and some have fiberglass or other stuff mixed in to keep it strong. I used it a lot in Vaccuum sealing applications. Also I would not expect the putty to release air bubbles, which could be a problem.
I am kind of confused after looking at your picture though... It seemed like your Fish Finder screen was all clutered? Is that right? Mine is perfectly clear except where I would expect to see noise or Hopefully marks... Good Luck |
|
|
|
|
06-06-2011, 08:23 AM
|
#4 | |
|
Senior Member
Join Date: Mar 2010
Location: San Diego
Posts: 2,385
|
Quote:
I was a doubtful about the putty myself but I thought well for a $1.29 it can't hurt and if it doesn't work, I'll just Goop it down when I get home. After seeing the results from yesterday, I am very happy with it.
__________________
No better time than being on the water, God Bless, JimmyZ
|
|
|
|
|
|
06-06-2011, 08:23 AM
|
#5 | |
|
Senior Member

Join Date: Mar 2009
Location: Menifee
Posts: 2,509
|
Quote:
|
|
|
|
|
|
06-06-2011, 04:42 PM
|
#6 |
|
Member
Join Date: May 2011
Location: Orange Ca
Posts: 60
|
Question for you guys who made your own live well;
What speed bilge pump are you using? I'm debating between a 500gph and a 360gph pump. The 500 seems like it blasts a lot of water, maybe too much. Any input would be appreciated. Thanks, Randy |
|
|
|
|
06-06-2011, 05:08 PM
|
#7 |
|
Senior Member
Join Date: Mar 2010
Location: San Diego
Posts: 2,385
|
I use the 360 and it works great.
__________________
No better time than being on the water, God Bless, JimmyZ
|
|
|
|
|
06-06-2011, 05:35 PM
|
#8 | |
|
Member
Join Date: May 2011
Location: Orange Ca
Posts: 60
|
Quote:
Thanks, Randy |
|
|
|
|
|
06-06-2011, 05:51 PM
|
#9 |
|
#1 on fishstick's hitlist

Join Date: May 2011
Location: Sea level
Posts: 1,477
|
i didnt make it but its home made. 360gph pump and 3.5gal bucket.
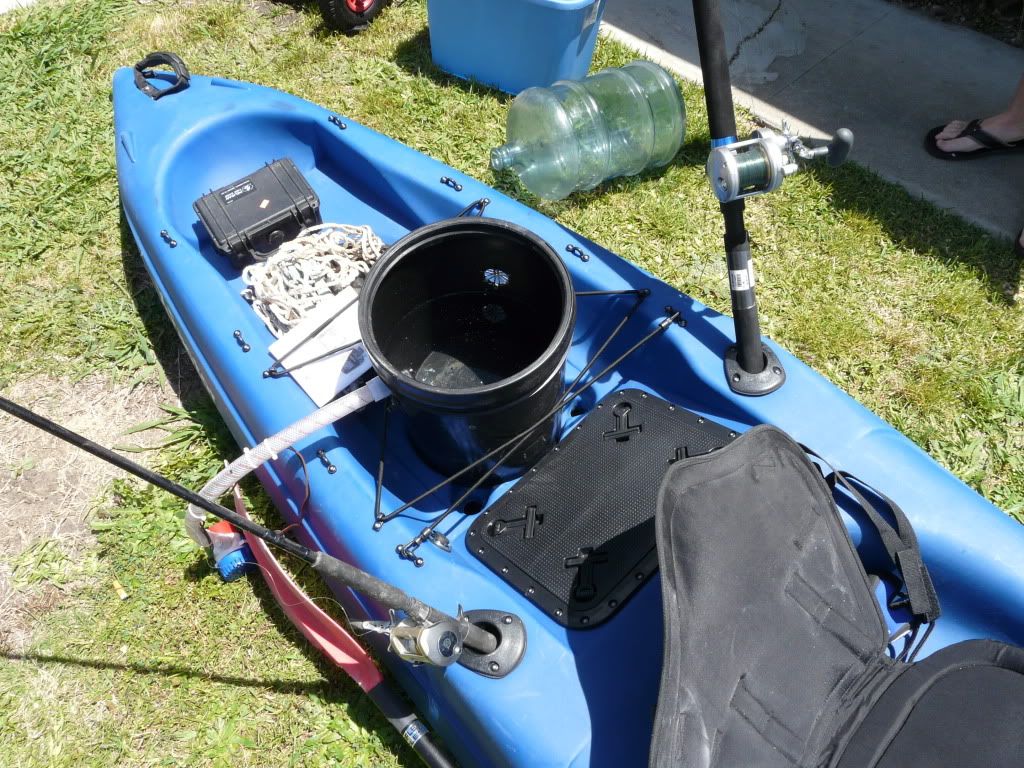 also made a rod holder that goes on the gator hatch. 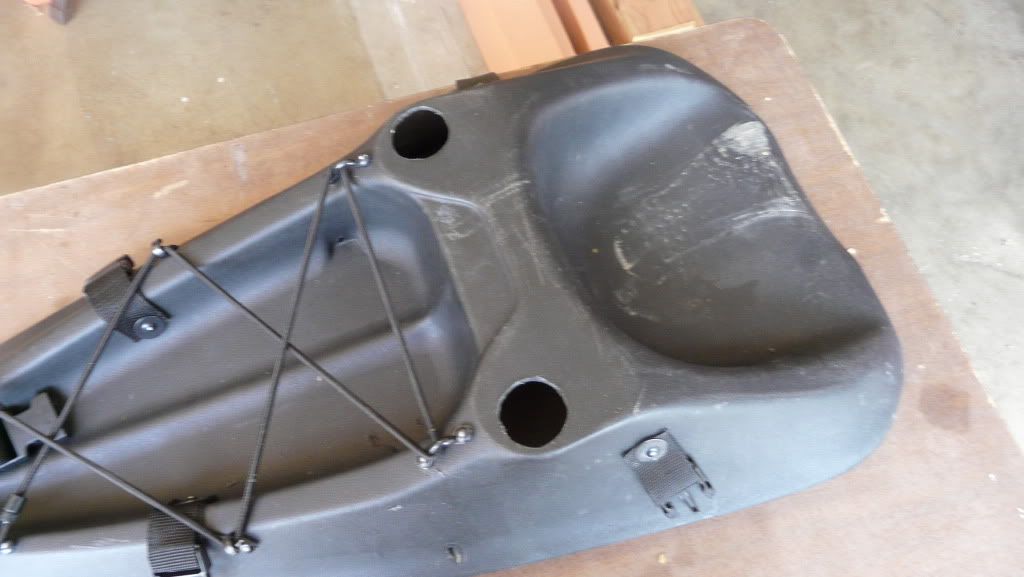 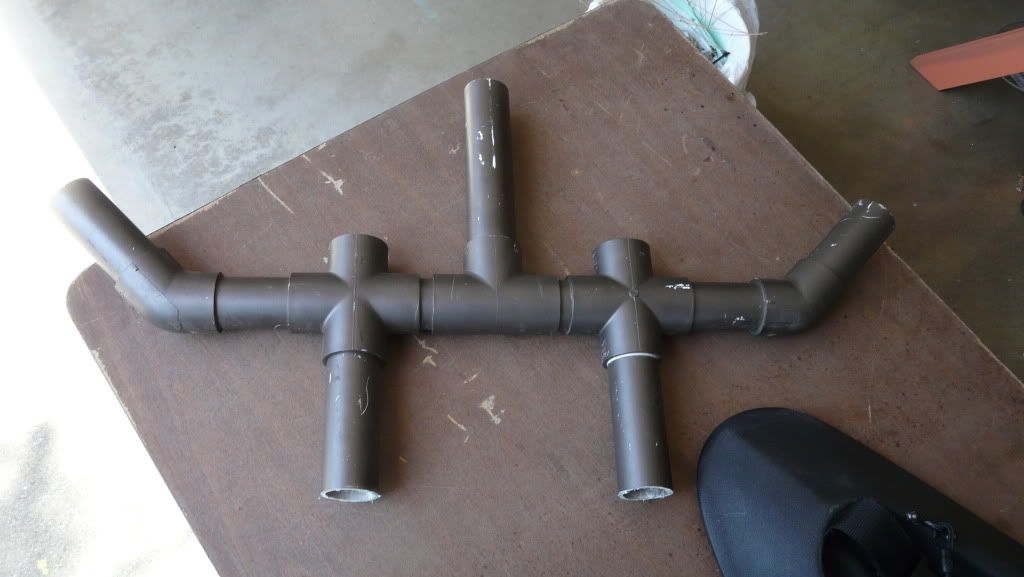 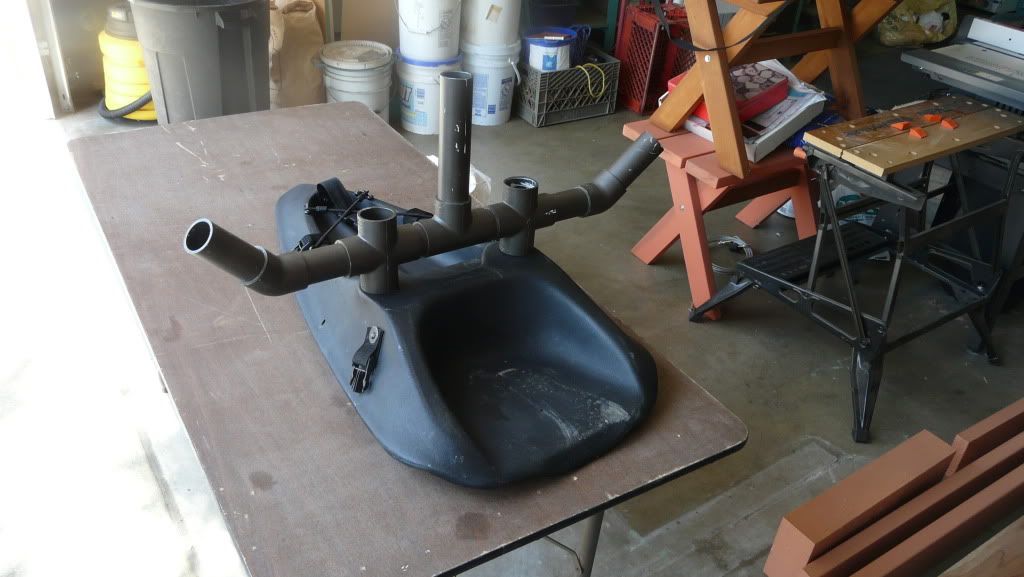 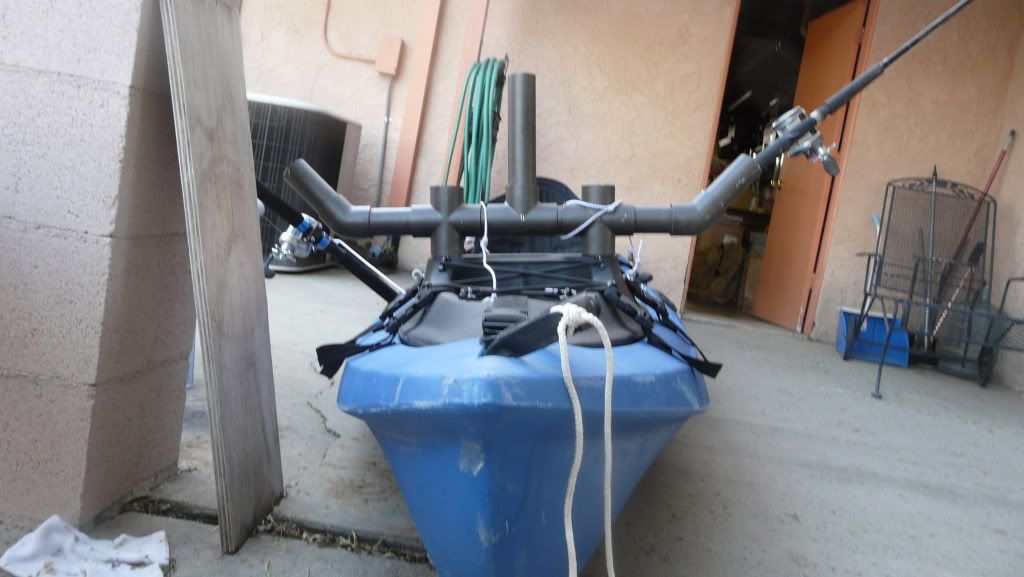 then i cut the bottom tubes to about 1 3/4" and glued a cap to the underside so it clamps the holder to the hatch then extended the top tubes. sorry for the cell pic 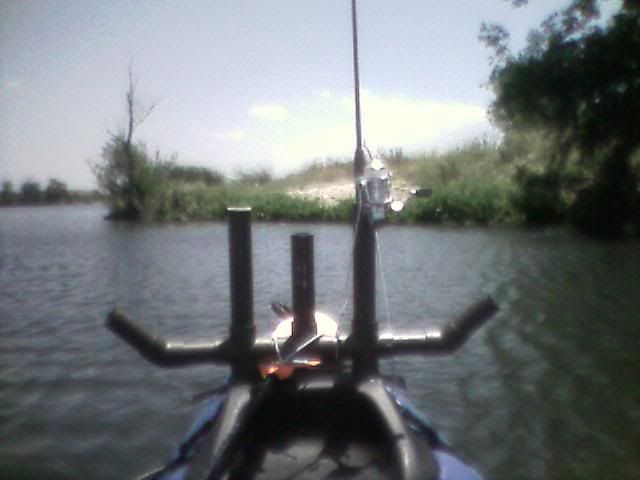
|
|
|
|
|
06-06-2011, 05:53 PM
|
#10 | |
|
Member
Join Date: May 2011
Location: Orange Ca
Posts: 60
|
Quote:
|
|
|
|
|
|
11-21-2011, 01:31 PM
|
#11 | |
|
#1 on fishstick's hitlist
Join Date: May 2011
Location: Sea level
Posts: 1,477
|
Quote:
so.. i did THIS! 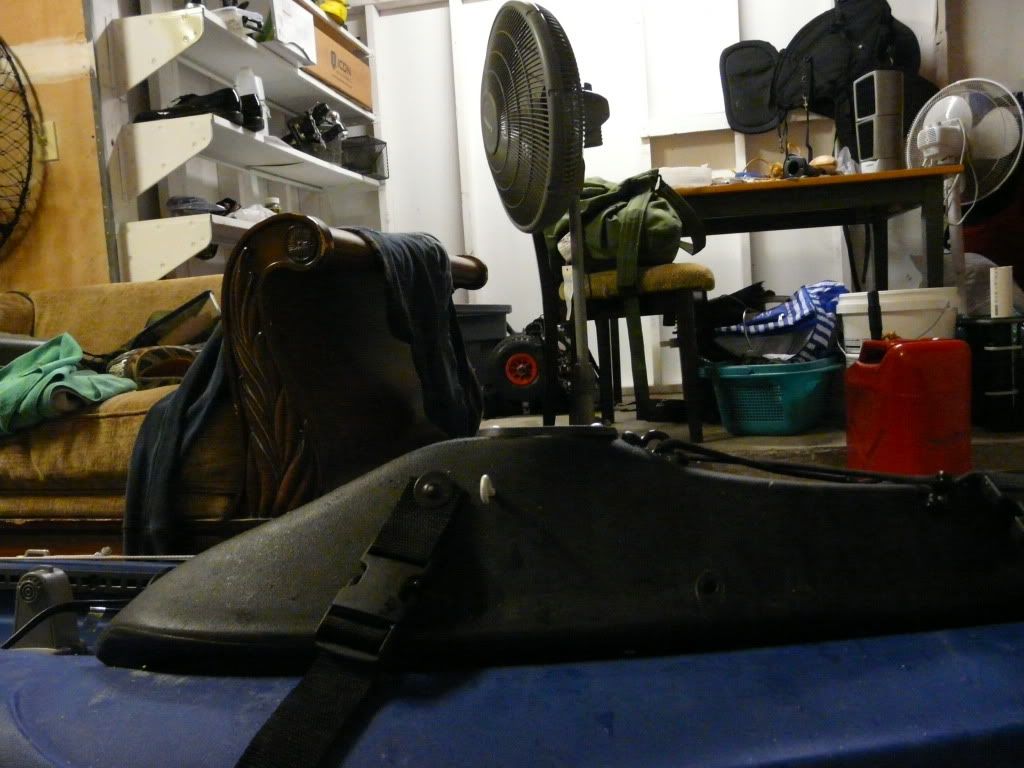 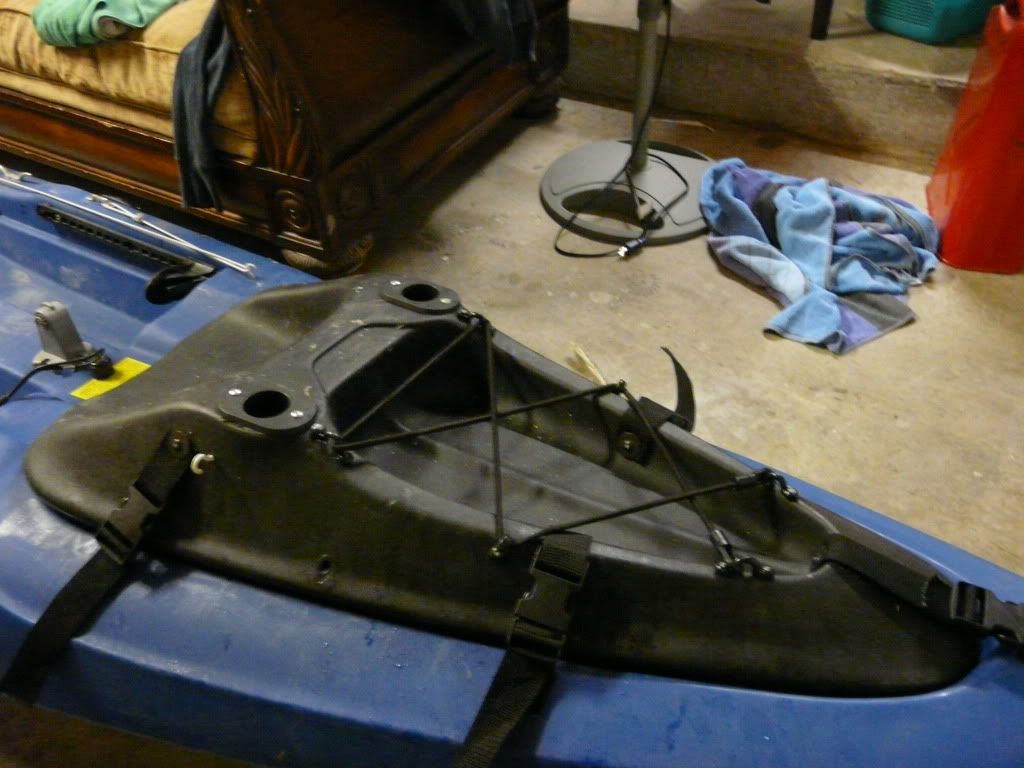 much better and more Lowprofile 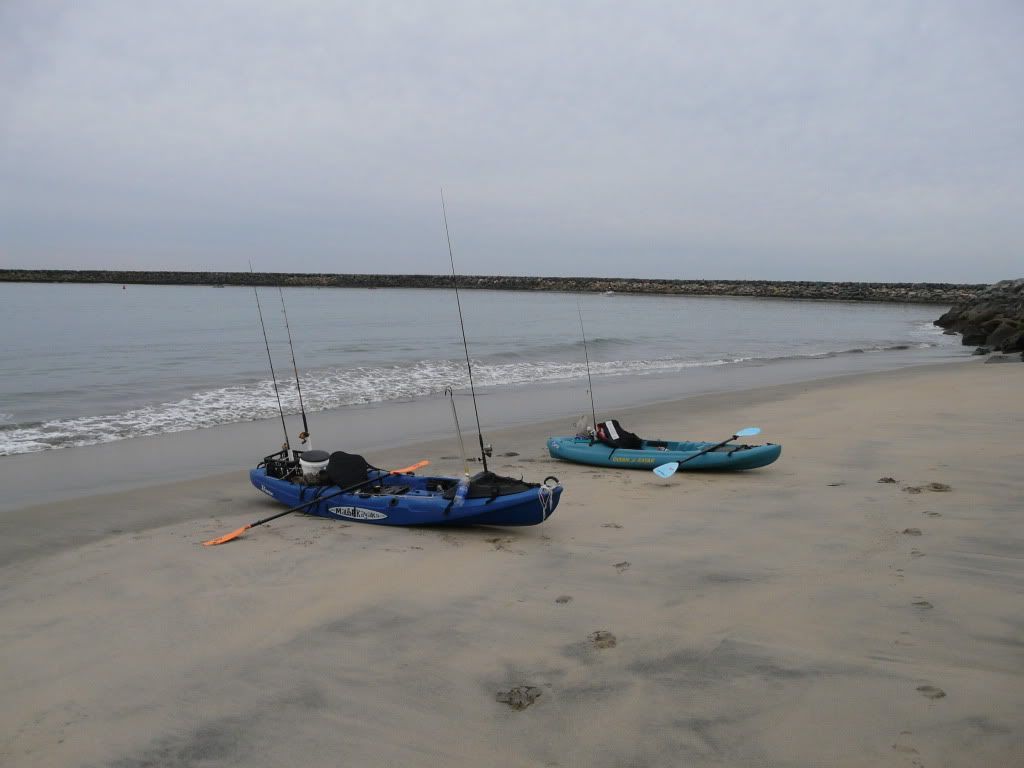
|
|
|
|
|
|
06-06-2011, 08:09 PM
|
#12 | |
|
Senior Member
Join Date: Mar 2010
Location: San Diego
Posts: 2,385
|
Quote:
__________________
No better time than being on the water, God Bless, JimmyZ
|
|
|
|
|
|
08-13-2011, 06:17 PM
|
#13 |
|
Senior Member

Join Date: Jul 2007
Location: San Pedro
Posts: 999
|
My New Vittles Vault Bait Tank / Live Well
After 4 years with the Shimano Bristlol Bay Bag / live well, it was time for a change.
The Shimano bag was great but it was starting to show its age, the plastic liner had gotten a little soft and would flex and sway if I had to heavy a rod load, the clear lid had dried out and after some modifications the lively Macks were still occasionally able to wiggle their way to freedom. What I wanted: A stiff container that would not flex. A rod holder that would accommodate the larger butts of a jig stick A simple and secure lid that was easy to open A portable rig that could be used on any kayak A tank with a smooth uncluttered interior and the ability to change the battery and trouble shoot on the water. I had thought about other containers, ice chest, buckets etc. and I was almost sold on the smaller Vittles Vaults box but decided to go big. I like what I have seen others do with these containers, and just added a few of my own ideas... I thought long about a thru the hull pump, then a thru the scupper pump. but decided on the old standard "over the side" pump for simplicity. Then I wanted to be able to remove the pump and hose for transport, But decided against an exposed plug at the battery. I like the way the pump stores on top of the tank so I don't think transport will be a problem. Wrapping the hose back into the tank on the Shimano Tank kinked the hose and I was always frustrated with that. So here you go: These are the secret fasteners, they are called Connective Cap Nuts, they are made to work with Shoulder Bolts, sometimes called Sex Nuts: 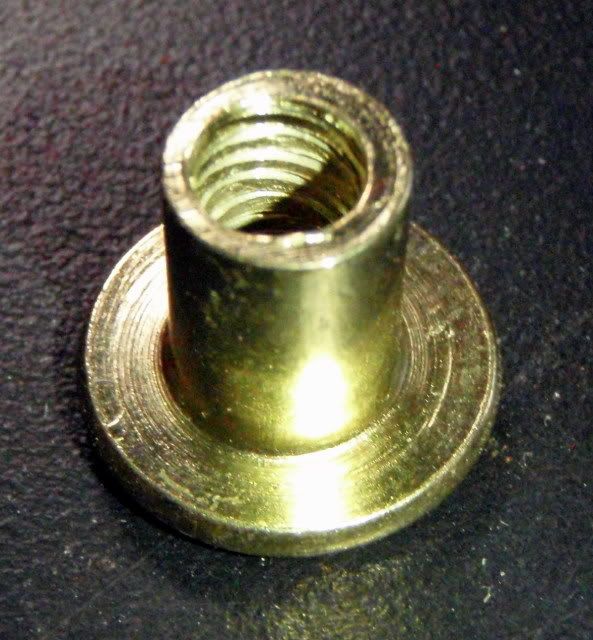 Side View: 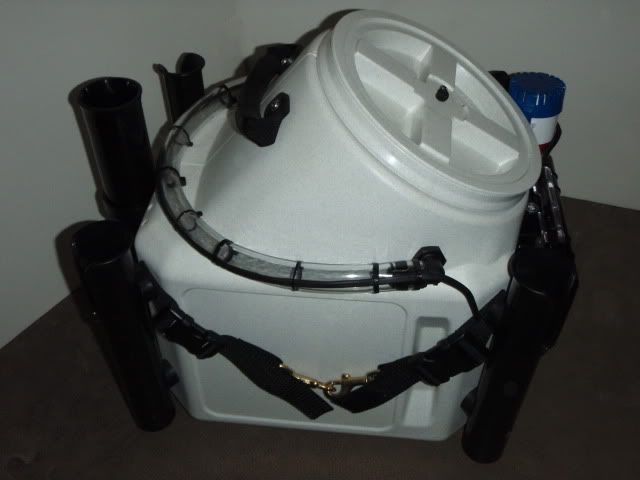 Adding the tie down straps, melted a hole in the strap with a soldering iron, bolted thru the rod holder: 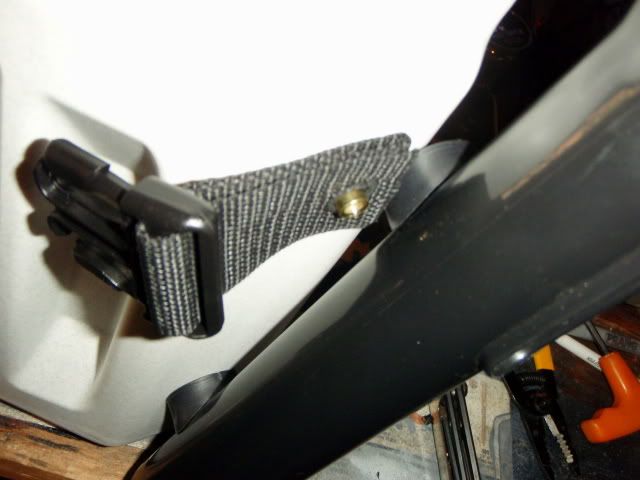 Finished strap with hose fitting and wire loom, a continuous length of shrink wrap over the wire harness from the pump into the battery box: 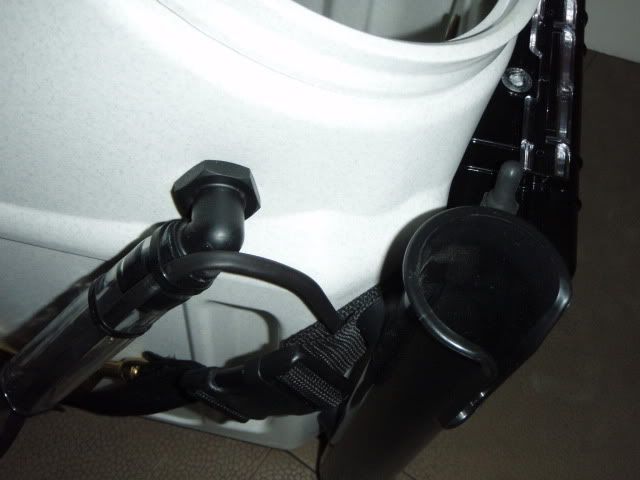 Detail of Pelican battery box install: 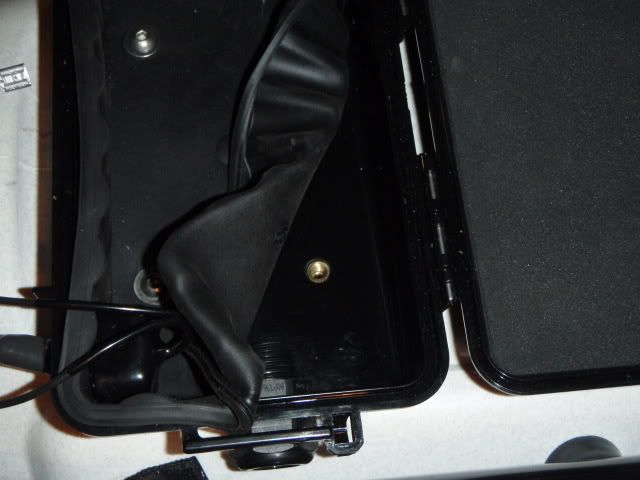 Top View, I may look into a round hatch mounted to the lid, so I don't need to "unscrew" the lid all day. 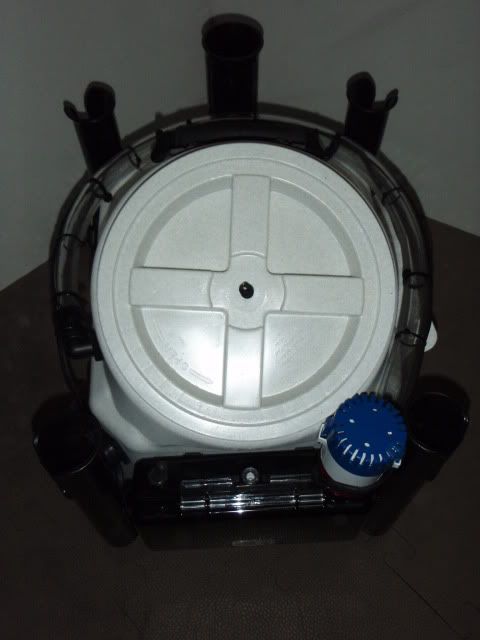 Front View, showing Pelican battery box, water proof switch, and 6V / 10Amp battery: 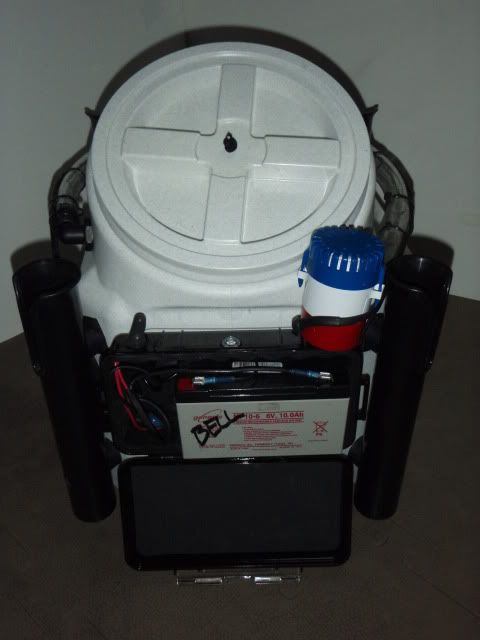 Back View, used regular rod holders at 4 corners and a 2 inch ABS pipe that I flared with heat gun, then made mounting brackets from a coupler that I cut in half and slid into position: 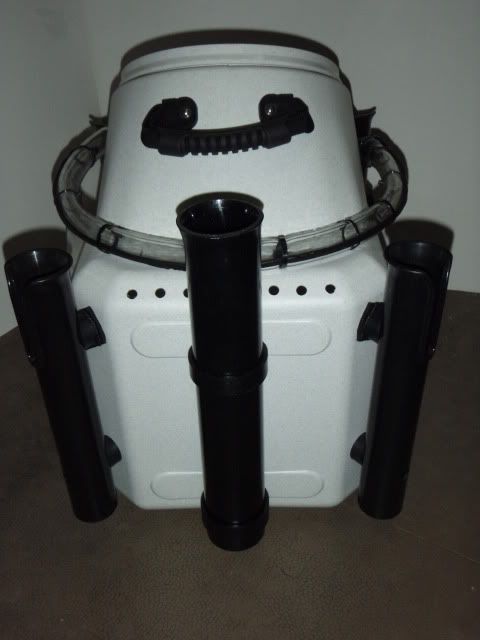 Inside View, I got the smooth surface I wanted, I may had a hose to fill the tank from the bottom, I may also add a fitting so I can adjust water level and drain the tank at rear, but for now I wanted to start simple: 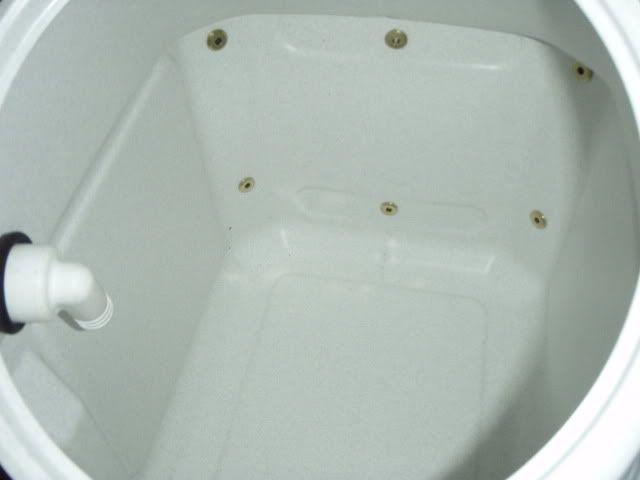 In the Trident: 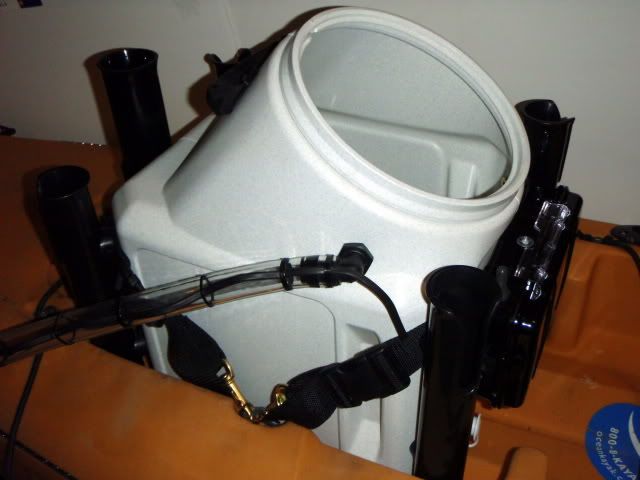 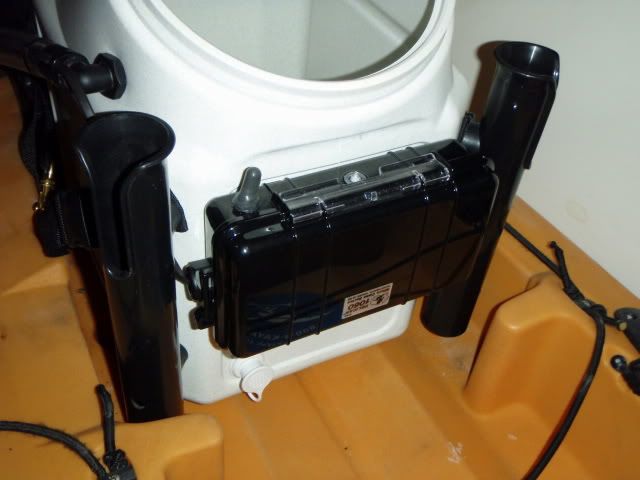 Only took about an hour to build, One visit to Andy to OEX Sunset and one or 2 trips to the hardware store... (BS  ) )I like it I wonder if it will fit in a Hobie some day? 
__________________
  
|
|
|
|
|
06-06-2011, 07:08 PM
|
#14 | |
|
Olivenhain Bob
Join Date: May 2008
Location: Olivenhain, CA
Posts: 1,121
|
Quote:
I have been using this technique for nearly a year now with no problems. Bob |
|
|
|
|
|
| Tags |
| kayak fishing inovations, kayak rigging ideas |
|
|


 Hybrid Mode
