|
|||||||
| Home | Forum | Online Store | Information | LJ Webcam | Gallery | Register | FAQ | Community | Calendar | Today's Posts | Search |
 |
|
|
Thread Tools | Display Modes |
 11-06-2013, 01:35 PM
|
#421 |
|
Senior Member
Join Date: Feb 2013
Location: San Diego
Posts: 619
|
My transducer for FF
Last edited by 619-SWIM-DOG; 11-06-2013 at 01:44 PM. |

|

|
|
11-06-2013, 01:38 PM
|
#422 |
|
Senior Member
Join Date: Feb 2013
Location: San Diego
Posts: 619
|
Pic
|
|
|
|
|
11-06-2013, 01:39 PM
|
#423 |
|
Senior Member
Join Date: Feb 2013
Location: San Diego
Posts: 619
|
Pic 3
|
|
|
|
|
11-06-2013, 01:41 PM
|
#424 |
|
Senior Member
Join Date: Feb 2013
Location: San Diego
Posts: 619
|
Pic 4
|
|
|
|
|
11-06-2013, 07:01 PM
|
#425 |
|
Senior Member

Join Date: Jul 2007
Location: Waiting to launch
Posts: 1,381
|
Swim-Dog, nice when you can mix in a "Full metal jacket" reference.
|
|
|
|
|
11-09-2013, 10:25 AM
|
#426 |
|
Junior
Join Date: Sep 2013
Posts: 1
|
Malibu Stealth Alternative Bait Tank / Livewell setup
Hi All,
Been lurking a while, nice to meet you all! I've seen so many helpful innovations, thought I'd share my bait tank plumb for anyone with a Malibu Stealth. Happy fishin! My goal was to plumb and wire the livewell without making the intrusive hole underside of the boat. I used the existing 'scupper' hole in the livewell. This offers the following - Less holes drilled in the hull - Easy removal of the whole pump (if you want to use the livewell as a dry extra storage hatch (stock setup) just re-plug the hole - You can still just use the stock livewell setup (no plug just flowing water through the 'scupper') First I made permanent strainer for the livewell. Used a small faucet / sink strainer from the Depot. Dremeled off the lip and Gooped it in place.  Next, get the cheapest Atwood bilge pump from Walmart (no need for anything super strong GPH wise). Get some plastic tubing and some PVC fittings (pictured from Home Depot) you wont need more than a foot worth for this setup. 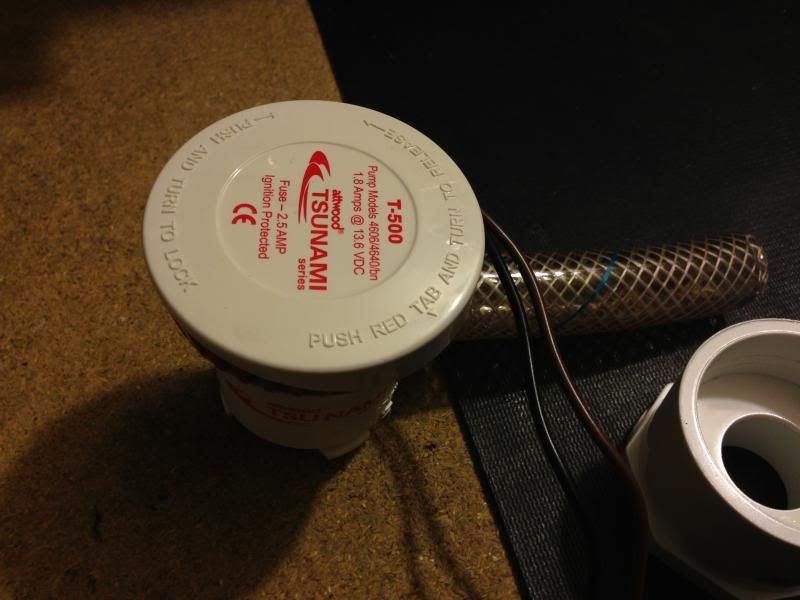 Goop it together (love that Marine Goop!) so it forms a base 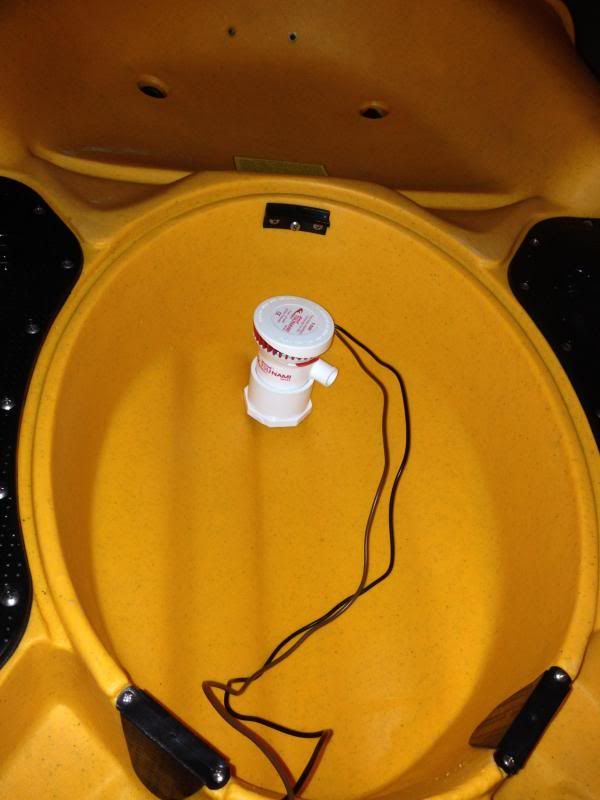 Slide some tubing (fits perfectly but i used shelf liner as extra support) in the base so you can slide the pump in and out of the scupper hole). I added a livewell sprayer head and fitting to be able to adjust the flow. 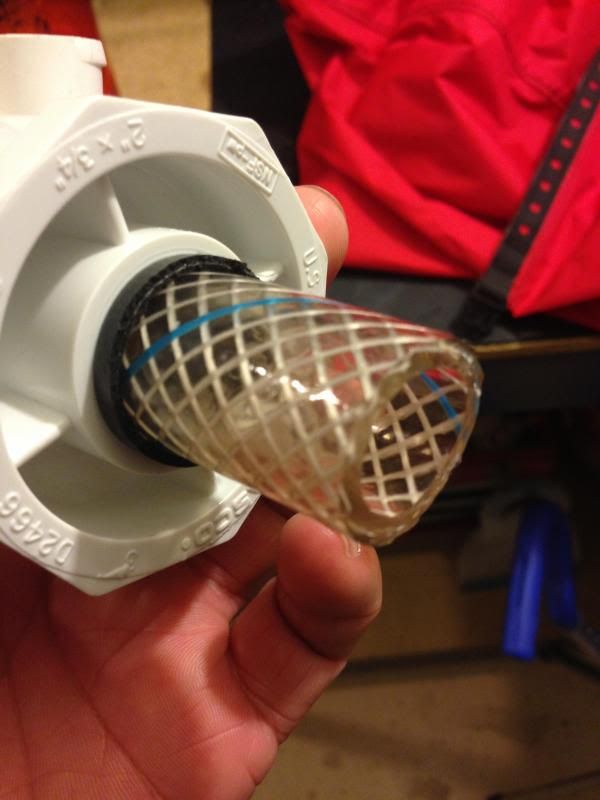 I wired the pump to a waterproof deck plug, into the hull, then into my battery box. There is no on / off switch (got lazy) but to turn off I simply unplug. Just drill out the drain hole (drains out footwell scuppers). It is super quiet and lasts over 16hrs (using a 6 volt SLA battery) Simple yet effective. 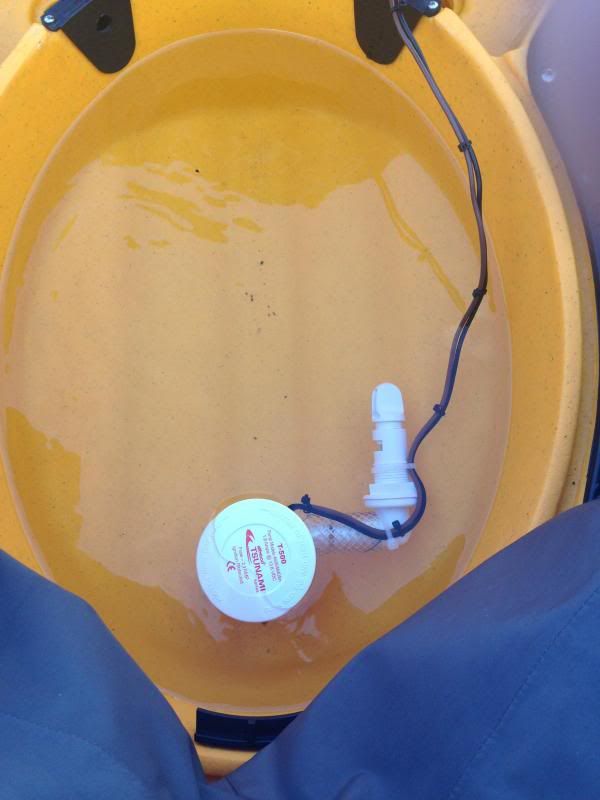 
|
|
|
|
|
11-09-2013, 04:53 PM
|
#427 |
|
Made in U.S.A.
Join Date: Oct 2012
Location: Dana Point
Posts: 1,625
|
I used that method (except I got a thread adapter and screwed the pump into the threaded drain) when I first got my S-12 because I didn't want to drill a hole in the bottom of my boat. It worked well for pumping water but it left the pump as a big obstacle for the bait and they didn't circle the tank well. It will work fine if you don't crowd the tank too much. In the end, I drilled the holes and mounted the pump through the hull with no problems.
__________________
Hobie PA 14 ¸.·´¯`·.´¯`·.¸¸.·´¯`·.¸><(((º> Jackson Kraken ¸.·´¯`·.¸.·´¯`·.´¯`·.¸¸.·´¯`·.¸><(((º> Malibu X-Factor ¸.·´¯`·.´¯`·.¸¸.·´¯`·.¸><(((º> Malibu Stealth-12 ¸.·´¯`·.´¯`·.¸¸.·´¯`·.¸><(((º> Its not a spelling B its a fishing B  ~yakjoe ~yakjoe
|
|
|
|
|
11-23-2013, 07:34 PM
|
#428 |
|
Member
Join Date: Oct 2013
Posts: 74
|
Saw the motor mounts that Malibu has got on their site and thought I could improve a bit...
I utilized the same angle iron concept (used stainless steel) that comes in the motor mount kits but the difference is I am using two pieces of aluminum that sandwich the top deck. The aluminum is Goop'd in place and will be there permanently. It's mildly tapered so it won't cut/scratch things... me in particular. I feel this distributes the load more evenly to the hull... also... only needs 2 bolts & wing-nuts to attach the motor mount to the kayak. |
|
|
|
|
11-23-2013, 08:25 PM
|
#429 |
|
Member
Join Date: Sep 2008
Location: Redding Ca
Posts: 85
|
Some Cuda 14 mods.
First I relocated the rocket launchers to behind the seat and in there place installed two flush mounts. I now have 4 rod holders right behind my seat, perfect for 2 setups my net and gaff with the tank well open for fish.
__________________
A SoCal to NorCal transplant Hobie Fishing Team Headwaters Adventure Company Kayak Fishing team |
|
|
|
|
11-23-2013, 08:30 PM
|
#430 |
|
Member
Join Date: Sep 2008
Location: Redding Ca
Posts: 85
|
Here's the rear view.
__________________
A SoCal to NorCal transplant Hobie Fishing Team Headwaters Adventure Company Kayak Fishing team |
|
|
|
|
11-23-2013, 08:31 PM
|
#431 |
|
Member
Join Date: Sep 2008
Location: Redding Ca
Posts: 85
|
In use. With our landlord issues on the north coast I prefer to keep my catch out of the water as much as possible
__________________
A SoCal to NorCal transplant Hobie Fishing Team Headwaters Adventure Company Kayak Fishing team |
|
|
|
|
11-23-2013, 08:36 PM
|
#432 |
|
Member
Join Date: Sep 2008
Location: Redding Ca
Posts: 85
|
Cuda 14 FF and battery set up. And yes I did get some flack for using Hobie through hull fittings from the Jackson guys but they are the best bang for the buck, $15.99 for 2. The transducer is mounted through a scupper under the seat using the Lowrance kit.
__________________
A SoCal to NorCal transplant Hobie Fishing Team Headwaters Adventure Company Kayak Fishing team |
|
|
|
|
12-11-2013, 02:22 PM
|
#433 |
|
Member
Join Date: Dec 2013
Location: Santa Fe Springs
Posts: 42
|
here is the front view. Changed the chair, put off road lights, and got it wrapped. Also got the ram mount for my transducer to hang off the side, and hid the 12v in my tackle box in the middle of the kayak. My electrical has all lazer etched switches for each light and have a usb cord if I need to charge my phone, you can see how neat the wiring is in picture 3.
Last edited by ROOKIE87; 02-26-2014 at 12:50 PM. |
|
|
|
|
01-22-2014, 07:11 PM
|
#434 |
|
Senior Member

Join Date: May 2013
Posts: 157
|
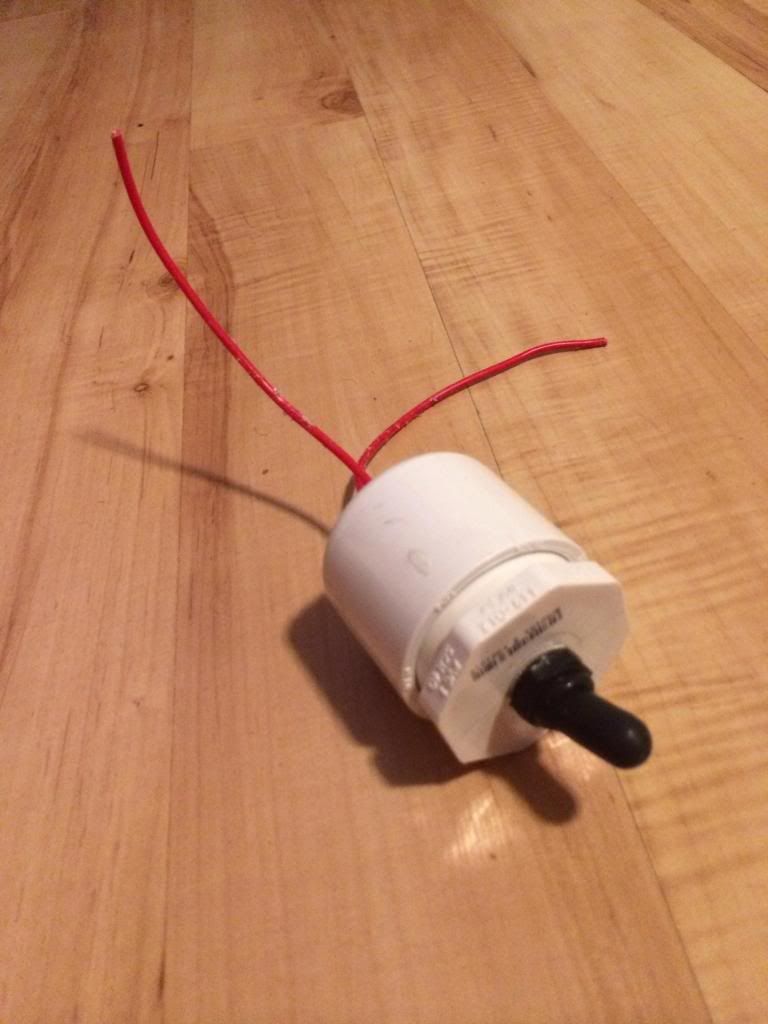
I didn't want to drill a hole in my kayak to put my live well pump switch on so I needed a different way to cover the switch. Just a female and male PVC cap fitted together with the switch inside. I'm sure someone sells something like this but I figured I'd make one out of PVC for a dollar.
__________________
fish forever, work whenever |
|
|
|
|
01-26-2014, 10:47 PM
|
#435 | |
|
Big Pappa
Join Date: Jan 2014
Location: In My Yak
Posts: 10
|
Quote:
__________________
Viper 10.4 ~ 
|
|
|
|
|
|
01-30-2014, 12:55 PM
|
#436 |
|
kayak fishing socal

Join Date: Nov 2013
Location: Southern California / Whittier
Posts: 438
|
 Has anyone built one of these I found this on Google image anyhow looks nice I want to build one but with bigger wheels Sent from my SAMSUNG-SGH-I537 using Tapatalk |
|
|
|
|
01-30-2014, 01:46 PM
|
#437 |
|
Senior Member
Join Date: Apr 2013
Location: Los Angeles
Posts: 1,862
|
My suggestion would be Not to glue the unit like one would do when assembling PVC for water pressure.
Everything has to line up, so any misalignment is permanent and it will cost money to replace or start over again. I have built rod holders with many connectors and angles. First I assembled the unit, then once happy with the unit, I used a small brush to apply PVC glue to the edge of the connector. It worked fine. Good luck. |
|
|
|
|
01-30-2014, 02:29 PM
|
#438 |
|
kayak fishing socal
Join Date: Nov 2013
Location: Southern California / Whittier
Posts: 438
|
I would do a dry fit and mark it with a Sharpie and then line up the two points
Sent from my SAMSUNG-SGH-I537 using Tapatalk |
|
|
|
|
01-30-2014, 02:42 PM
|
#439 |
|
Senior Member
Join Date: Jun 2011
Location: Too far from the launch.
Posts: 443
|
Just run a couple of screws through the coupling to keep the pipe from twisting/pulling out.
__________________

|
|
|
|
|
01-31-2014, 07:39 AM
|
#440 |
|
Junior
Join Date: Mar 2011
Posts: 6
|
Pro Angler 14 dual seats Innovation
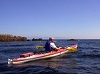
Pro Angler 14 Dual seats/tandumn seats.
This is such a big boat, why be selffish share a ride. 
|
|
|
|
|
| Tags |
| kayak fishing inovations, kayak rigging ideas |
|
|


 Linear Mode

