|
|||||||
| Home | Forum | Online Store | Information | LJ Webcam | Gallery | Register | FAQ | Community | Calendar | Today's Posts | Search |
 |
|
|
Thread Tools | Display Modes |
 06-02-2012, 08:44 PM
|
#241 |
|
Senior Member

Join Date: Sep 2011
Posts: 598
|
|

|

|
|
06-06-2012, 10:03 PM
|
#242 |
|
Member

Join Date: Nov 2011
Location: Oceanside Ca
Posts: 49
|
Why spend tons on a Scotty rod holder? $3 bucks PVC LOL....
Last edited by Cvaladez2; 06-06-2012 at 11:53 PM. |
|
|
|
|
06-07-2012, 05:18 AM
|
#243 | |
|
Senior Member

Join Date: Mar 2010
Location: San Diego
Posts: 2,385
|
Quote:
__________________
No better time than being on the water, God Bless, JimmyZ 
|
|
|
|
|
|
06-08-2012, 07:09 AM
|
#244 |
|
Senior Member

Join Date: Jun 2010
Location: Alhambra
Posts: 506
|
thats pretty thrifty of you to use the pvc that way. if you paint it black it would look more factory.

|
|
|
|
|
06-09-2012, 07:50 PM
|
#245 |
|
Member
Join Date: Feb 2012
Location: San Diego, CA
Posts: 30
|
I use a pump-type garden sprayer to wash sand off the kayak be loading on my SUV. Also can be used to washdown rods and reels, etc.
Lots of great ideas here...Thanks |
|
|
|
|
06-10-2012, 06:23 AM
|
#246 |
|
Senior Member
Join Date: Mar 2012
Location: Utah
Posts: 138
|
I originally posted this in the general forum, but decided to duplicate it here so it wouldn't scroll off into oblivion...
Hobie Pro Angler-14 Simple Seat Riser Mod For you Pro Angler-14 owners: I wanted a higher seat in my PA14, for a better leg angle while pedaling, and for general comfort. It would also allow my old bones to stand up easier! Here's what I built, in rough state but fitted together. After a trial or two on the water, I'll round the edges with a router and then sand and finish it. Parts List: One 32" length of 2x4 (I used a piece of fir with straight grain) Four 1/4" x 1½" galvanized cap-head bolts Two 1/4" x 3" bolts Two 1/4" x 4" bolts Four 1/4" nuts and eight washers Cut the 2x4 into two 16" pieces. Mark the bolt hole locations. Using a hole saw, drill two 1½" holes through the sides of each riser, centered. Drill four 5/16" bolt holes from top and bottom, into the large holes. Assemble. Attach the risers to the seat using four 1½" bolts and washers. Attach the aluminum base using the 4" and 3" bolts, with washers and nuts. Here are the risers attached to the base, for clarity. (I trimmed the riser ends at 45° for a better look.) 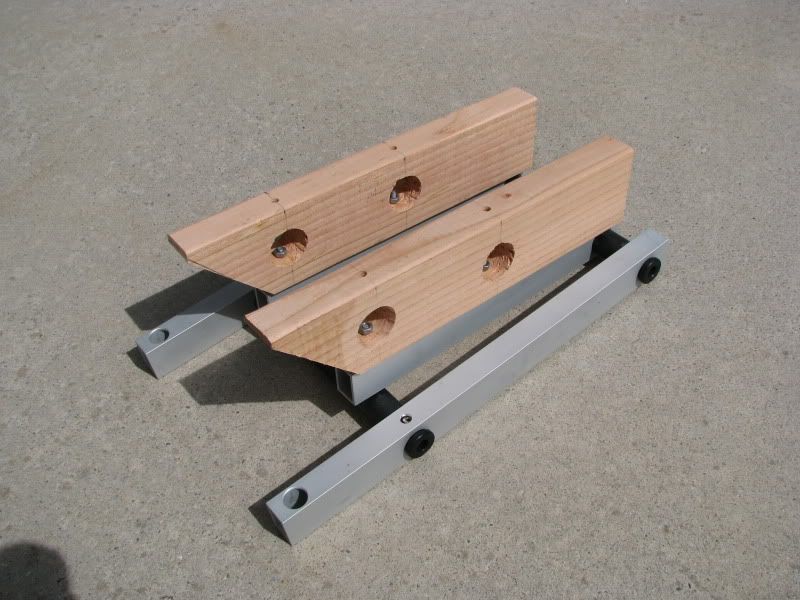 Here's the seat and base, upside-down 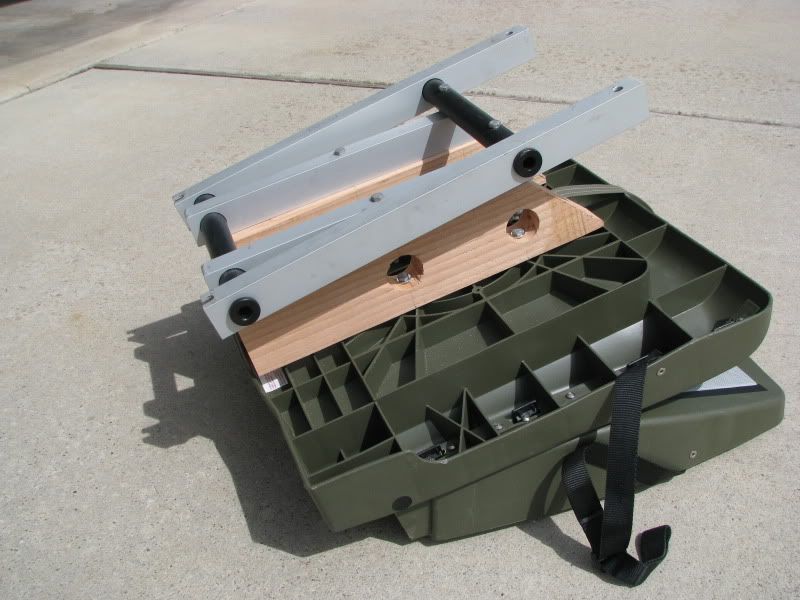 Here's the assembled unit from the side 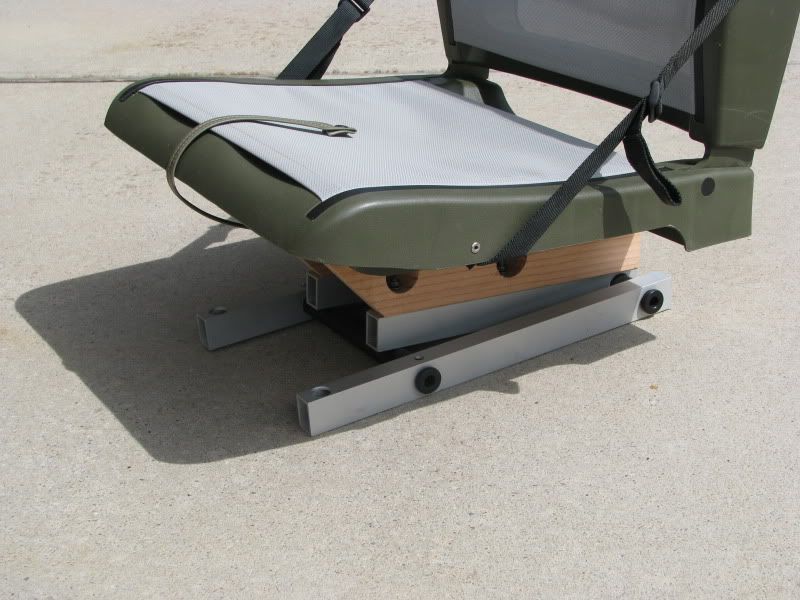 And from the front 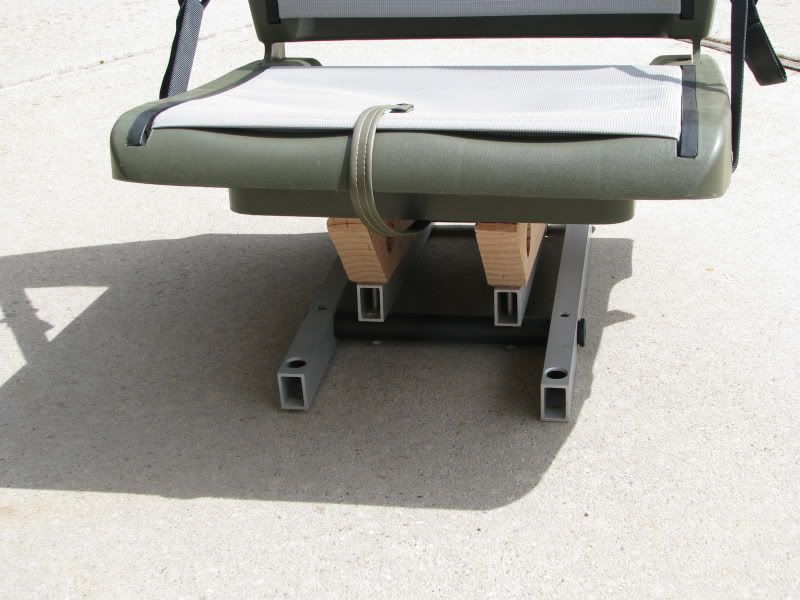 Note the added storage room, too! Total cost was about five dollars. Hard to beat that. |
|
|
|
|
06-13-2012, 03:05 PM
|
#247 |
|
Senior Member
Join Date: Mar 2012
Location: Utah
Posts: 138
|
Finally got the boat out today to test that seat mod.
Folks, it's magic. My leg angle from hips to pedals is MUCH improved. That means I'm no longer resting right on my tailbone the whole time. Discomfort and fatigue are drastically reduced. Now, I can take it apart and "purdy" it up some with rounded edges and some sealer and stain. I recommend this mod to anyone who owns a PA-14. |
|
|
|
|
06-18-2012, 05:30 PM
|
#248 |
|
Member

Join Date: Jun 2012
Location: Port Hueneme CA.
Posts: 35
|
Hello
I like to post these links on a few items that may help you folks on your bait tanks. Just check your local Aquarium shop for them. http://www.drsfostersmith.com/produc...93&pcatid=3693 http://www.drsfostersmith.com/produc...76&pcatid=4076 http://www.drsfostersmith.com/produc...99&pcatid=8999 http://www.drsfostersmith.com/produc...80&pcatid=4080 https://www.strapworks.com/default.asp The last link is a company that carries Tubular Webbing for rod leashs Cheers Saba  |
|
|
|
|
06-20-2012, 02:33 PM
|
#249 | |
|
Senior Member
Join Date: Mar 2010
Location: San Diego
Posts: 2,385
|
Quote:
__________________
No better time than being on the water, God Bless, JimmyZ
|
|
|
|
|
|
07-03-2012, 03:43 PM
|
#250 |
|
Senior Member
Join Date: Sep 2011
Posts: 598
|
portable rod holder.
well since I'm stuck on land for awhile. I wanted to update my rod holder. One that can hold more rods and it doesn't' get in the way of my hobie when its loaded on my truck. everything cost under $50 |
|
|
|
|
07-06-2012, 09:27 AM
|
#251 |
|
Junior
Join Date: Jun 2012
Posts: 1
|
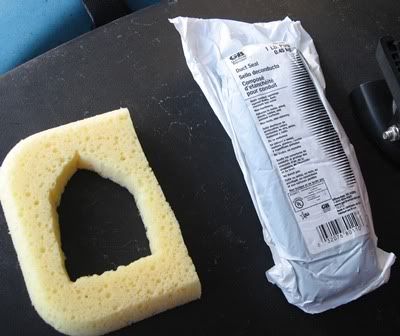
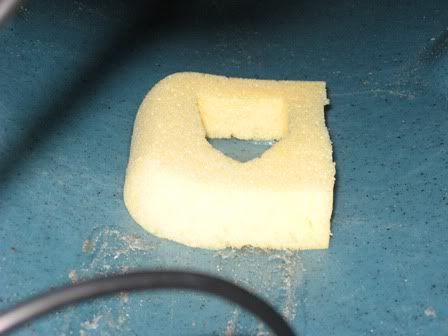
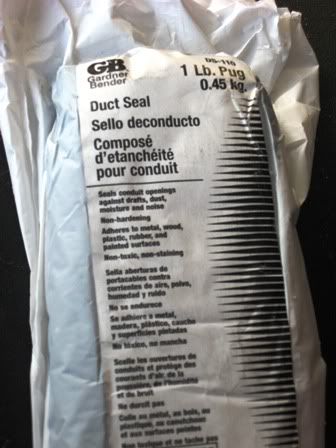
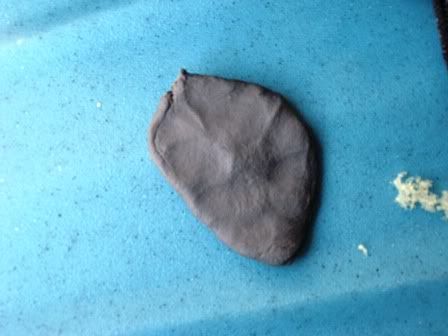
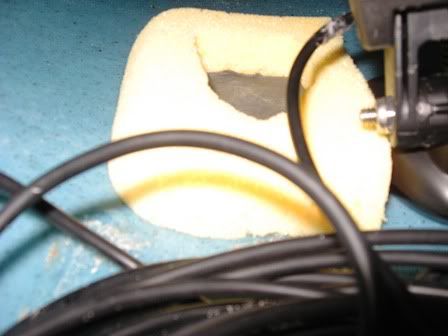
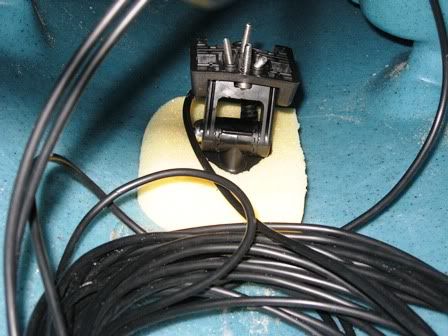
What is your transponder gooped to, a sponge?
|
|
|
|
|
07-06-2012, 10:16 AM
|
#252 | |
|
Senior Member
Join Date: Mar 2010
Location: San Diego
Posts: 2,385
|
Quote:
__________________
No better time than being on the water, God Bless, JimmyZ
|
|
|
|
|
|
07-06-2012, 03:41 PM
|
#253 |
|
Senior Member

Join Date: Apr 2010
Posts: 6,855
|
Hobie POS-S Replacement
I decided to replace my Hobie Stock P.O.S Seat so I contacted Andy @ OEX, asked for a price and recommendation, got an answer back in no time and paid him a visit. Ended up purchasing the last last years years model Pacific Anglers seat, as always, Andy took care of me.
After looking at the structure of the old seat and the new one I chose to not use the standard pegs that the Hobie seats come with. Since the PA seat is not made to accept these pegs I would have had to drill/cut into the new seat, the problem with this idea is that the area where the plugs would have placed is not sturdy, there is a great chance I would have damage the integrity of the seat, maybe not now but definitely over time. First step and the most obvious was to remove the stock seat  Step 2 Mount the bait tank and check the surrounding area to make sure that I have space for the eyelets mounts without affecting the installation of the bait tank and the buckles for the seat  Step 3 Drill, goop and rivet eyelets that will receive the rear buckles  Step 4 Adjust seat, make sure everything fits and load car for fishing tomorrow  
__________________
 www.facebook.com/Teamsewer |
|
|
|
|
07-06-2012, 03:52 PM
|
#254 |
|
Senior Member
Join Date: May 2012
Location: The Matrix
Posts: 643
|
^I just bought that same exact seat for my OK Trident from Andy a few weeks back. Only used it once, but I like it. I've found the rod holder's to be nice, but not the best.
Best of all, 6 hours on the water and my back felt great. No complaints on that end.
__________________
-Kevin |
|
|
|
|
07-07-2012, 07:22 AM
|
#255 |
|
Senior Member
Join Date: Sep 2011
Posts: 598
|
|
|
|
|
|
07-07-2012, 08:32 AM
|
#256 | |
|
Senior Member
Join Date: Mar 2012
Location: San Bernardino, CA
Posts: 913
|
Quote:
any ideas on correcting that problem?
__________________
Remember There are Many Fish in the Sea MEANS MORE TO EAT!!! |
|
|
|
|
|
07-07-2012, 09:30 AM
|
#257 | |
|
Senior Member
Join Date: Mar 2010
Location: San Diego
Posts: 2,385
|
Quote:
__________________
No better time than being on the water, God Bless, JimmyZ
|
|
|
|
|
|
07-07-2012, 09:51 AM
|
#258 | |
|
Senior Member
Join Date: Sep 2011
Posts: 598
|
Quote:
|
|
|
|
|
|
07-07-2012, 05:08 PM
|
#259 | |
|
Senior Member
Join Date: Mar 2008
Posts: 611
|
Quote:
I have been thinking of doing that for a while now
__________________
 http://www.savecafishing.org/ |
|
|
|
|
|
07-07-2012, 09:02 PM
|
#260 | ||
|
Senior Member
Join Date: Mar 2012
Location: San Bernardino, CA
Posts: 913
|
Quote:
This is what I normally do jimmy! But having a sabiki rod that is solid that I can just hide away in my holder on my pa just seems to be a lot neater because I will make sometimes 2 or 3 times when I go out. it would be easier to do that then just having to hassel with free sabiki hooks Quote:
Also for those who have a little problem with all the extra sabiki hooks hanging around like I do when I use a full sabiki rig try this. Take your sabiki and cut it in half. Use only 3 hooks and put a swivel on both halves can make it safer and a saver then having to deal with 5 hooks floppin around with only one greenie on there. also you save another sabiki when a hook gets messed up. I will put pics up of this idea eventually just don't have any sabiki's on me right now. Hope yall get what I am talking about here! Thanks again to echo1er for that idea of melting to down to round it!
__________________
Remember There are Many Fish in the Sea MEANS MORE TO EAT!!! |
||
|
|
|
|
| Tags |
| kayak fishing inovations, kayak rigging ideas |
|
|


 Linear Mode

