|
|||||||
| Home | Forum | Online Store | Information | LJ Webcam | Gallery | Register | FAQ | Community | Calendar | Today's Posts | Search |
 |
|
|
Thread Tools | Display Modes |
 07-29-2010, 09:57 AM
|
#81 |
|
Noob Supreme
Join Date: Jul 2010
Location: Cherry Valley, CA
Posts: 12
|
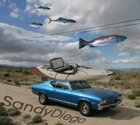
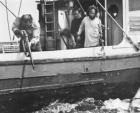
I got rid of my Jeep and got a new truck, my Yakimal towers wouldn't fit, nor did I want to spend another $500 bucks on Yakimal's truck bed tower system. Soooooo I bought a $150 dollar ladder rack. But.. I didn't want to drill holes in my truck. So I welded two pieces of pipe onto the side of each bracket-- and got some "J" bolts. The "J" bolts run through the pipe and down along side the truck's rail-- the J part hooks under the rail and then I crank a bolt down to tighten the brackets down. The bar at the top of the rack puts more pressure against the brackets (horizontally) at the bottom. They aren't going anywhere. To top it off takes me about 10 minutes to remove the whole thing! Then I just installed my old Yakimal Hullyrollers and Mako Kayak saddles via stainless steel hose clamps. So for a total of about $200 bucks I got a nice solid kayak rack.     The yellow yak is my wife's Navigator the white yak is my Fish'n'Dive Haven't figured out how to transport my son's Cobra Explorer... any Ideas? |

|

|
|
07-29-2010, 10:17 AM
|
#82 | |
|
Olivenhain Bob

Join Date: May 2008
Location: Olivenhain, CA
Posts: 1,121
|
Quote:
Bob |
|
|
|
|
|
08-03-2010, 08:13 AM
|
#83 |
|
Rum Pirate
Join Date: Mar 2010
Location: Wilds of Mira Mesa
Posts: 388
|
I have a shell on my 2009 f150. I have a 6ft bed and put my pro angler in the back. The shell has a yakama rack on it for two more on the top.
|
|
|
|
|
08-03-2010, 08:30 AM
|
#84 |
|
Senior Member
Join Date: May 2007
Location: S.D.
Posts: 133
|
RACK?
check out harbor freight and ask for the truck bed extender the connects to your square hitch receiver it only cost me 35$ its quisk and easy to removed/install
|
|
|
|
|
08-03-2010, 09:33 AM
|
#85 |
|
Noob Supreme
Join Date: Jul 2010
Location: Cherry Valley, CA
Posts: 12
|
I like both idea'ers--- thanks
I'll post pictures asap. Thanks again. |
|
|
|
|
08-31-2010, 07:14 PM
|
#86 |
|
Senior Member

Join Date: Jun 2010
Location: Alhambra
Posts: 506
|
leashes
thought that i would add me two cents to this forum:
made rod leashes and hobie pedal leash, average cost was $5 materials: climbing rope (sport chalet .59 per ft), shock cord (sport chalet .39 per ft), quick release tabs (walmart 2pair $1 something), clips (walmart 2pc less than $1) ran the shock cord (doubled it) thru the climbing rope. measured the climbing rope for 38" then stretched the shock cord to the max and then sewed the ends, leave 4" for quick release male end, this does not need the shock cord. then sew up the other female end of quick release to climbing rope 6" long. make sure to add some shock cord tie a double knot to end long enough to use to lock down the fishing rod or pedals. hope this helps. if you don't sew, take these over to your local dry cleaners, and see if they can do the sewing for you. you'll need a pretty strong sewing machine to get thru the shock cord. the climbing rope and shock cord are great. sport chalet gives a good guide line of what type of weight these can take. here are some pictures. |
|
|
|
|
08-31-2010, 07:29 PM
|
#87 |
|
Senior Member
Join Date: Jun 2010
Location: Alhambra
Posts: 506
|
wet mount for transponder
i tried to use goop to mount my transponder, but it did not work so well. finally switched it over to a wet mount. thought i would share what i did.
used a plastic container, the cheap type that is sold by glad or reynolds the type that comes in a pack of 5 or something like it. this is so that the plastic is softer and will give with the yak as it twist and turns. cut out the bottom of the container and used goop to seal the edges. i squeezed alot of it around the bottom of the container then pushed it down to the bottom of the yak behind my sail mast on the hobie, but first took out the sail mast by unscrewing it. than let it kinda set, but before it set thoroughly, i ran my finger around the edges on the inside and out side of the container. felt for open seams. then added more goop around the edges of the container, ran my finger around it again. let it set over night and checked for any leaks. so far so good, no leaks. took my lid and drilled a hole big enough for the cable, then cut the top of the lid like an X to allow for me to push the transponder thru to the other side. pushed the cable to the hole and used duct tape to seal the bottom of the lid. i have been using this for a few weeks and had not had any leaks. i transported the yak to L.J. and back. still holding water. hope this helps you guys. |
|
|
|
|
08-31-2010, 07:45 PM
|
#88 |
|
Senior Member
Join Date: Jun 2010
Location: Alhambra
Posts: 506
|
magnets inside yak
i found a rack mount for tools in sears. they use earth magnets so that you can attach yard tools or what not to the wall mounted rack. i instead found a better use for these puppies.
took the wall rack and cut it in half, used a hack saw. then mounted each half inside the center hatch of my hobie outback. i used goop for this. there are these attachments that came with the wall rack that you would use for the handles of the yard tools. i instead mounted these into the bottom of my yak to keep my trays from moving around inside. they also have a magnet so i attached piece of metal to the tray using a rivet gun and that in turn is held by the magnet from moving around. i got some tackle boxes from big 5 or bass pro shop, big enough to hold most of my gear, but not too big that it won't fit into the 8" round hatch. got some metal strips from a hardware store and just tape these onto the bottom of the boxes using duct tape. they slide into the hatch and sits on top of the earth magnets. they don't move around, but they are still easy enough to get out of the hatch without too much effort. i added some trays from target. using one to hold my hooks. i added a piece of rubber foam from mouse pad to the lid of my hook container. the hooks were moving into other compartments and also getting wet. i also took the plastic from the mouse pad and cut it into the shape of the hatch. i mounted this using contact cement the type that you spray on (a 3m product). i did this so that i can use it for a cutting board for bait. here are some pictures. |
|
|
|
|
08-31-2010, 07:46 PM
|
#89 |
|
Senior Member
Join Date: Jun 2010
Location: Alhambra
Posts: 506
|
picture of mouse pad
this is a picture of the mouse pad i used to my cutting board.
|
|
|
|
|
09-09-2010, 09:19 PM
|
#90 |
|
Olivenhain Bob
Join Date: May 2008
Location: Olivenhain, CA
Posts: 1,121
|
Utility Belt for your Bait Tank
Fishing has been a little slow so to help keep the juices going, I went to the shop and started tinkering.
One of the biggest issues associated with fishing from a kayak is where to stow the gear. We have hatches in the bow and stern but most of the time these storage areas are hard to get to while on the water. The center hatch is golden but usually crammed full of the most essential gear. Where do you keep the important, but not mission critical gear? Some of the really big kayaks have lots of easily accessible storage areas in the "cockpit". I ride a Revo which, while a great kayak, does not offer much in the way of accessible storage. Somehow we still manage to make do but I know things could be better. I started thinking about ways to augment the stock setup and came up with the idea of a Utility Belt which I would attach to my bait tank. Utility belts are cool. Batman had one. So did Tim the Toolman Taylor, (and Heidi). The idea was to find a way to strap some small items to the bait tank making them easily accessible and not all jumbled up with the other stuff that I store in the center hatch. I started with a piece of shoulder strap webbing from one of the many pieces of luggage or trade show giveaways that I have collected over the years. I chose one with all plastic components. I purchased some snap buckles and assembled the belt attaching one end permanently to the handle of my Hobie tank and clipping the other to a ring attached to the other end of the tank. There are dozens of ways to do this. Another option would be to attach some pad eyes and clip to those. Use your imagination. Once you have figured out a way to attach the belt to the tank, the next step is putting your gear on the belt. For this demonstration I have attached a holster for my needle nose plyers, a fillet knife and an ABS tube that will eventually hold the net for my bait tank. When I get around to making the belt for the other side of the tank, I might attach a water bottle holder, another tube to hold my gaff, first aid kit, bilge pump or one of the other important pieces of gear that we would like to have in an easy accessible location. Here is the basic belt setup. Belt.jpg Here is where the belt attaches to the tank at the handle. Clip.jpg This is the installed belt before I add some of my other gear. Belt-on-tank.jpg This photo shows the belt installed after I have installed my rod holder assembly. (Revo owners, if you have not checked out this rod holder device, you should. It is displayed earlier in this post.) Belt-with-Rod-Holder.jpg This is still a work in progress but I think it may make my days on the water a little better. Bob Last edited by dsafety; 09-10-2010 at 05:51 AM. |
|
|
|
|
09-16-2010, 07:23 PM
|
#91 |
|
Senior Member

Join Date: Apr 2010
Posts: 6,855
|
OK...lets see if I finally figured out the whole text between pics thing
Here are my innovations...some you might recognize. FF mounted onto a Pelican 1120 waterproof case. The power cord runs from the FF through the FF mount and into the case. The transducer cord runs from the FF into the hull of the yak via a clam style waterproof seal.  I decided to do without the wet mount for the transducer and opted to mount it in one of the scupper holes. The transducer cord runs from the FF into the hull and back out right near the scupper hole.   One of the problems I encountered was that because the top of the transducer sat flush with the bottom of the yak it did not allow water to drain out the scupper hole. I decided to take some 1-1/2" pvc and cut a piece about 1/4" long. I took a rats tails file and make a few notches to allow water to drain between the yak and the top of the transducer....works great!!!  During some of my trips I would have issues closing the hatch that sits right in from of the seat. I'm 5'10" and weigh about 230, I was causing a slight bend on the edge of the hatch and this would prevent me from getting the hatch installed. I decided to take some 1" x 1" angle iron and mounted it both to the yak and the hatch, this helped keep them somewhat straight and prevent most if not all of the bend. I secured the angle iron to the hatch with some aluminum rivets and used the existing nuts and bolts to mount it onto the rim of the hatch.    When I sold my boat I ended up with two gaffs so I decided to take one and cut it down. Not wanting to lose grip of it when and if I ever gaff a large fish I took an old belt and strapped it down using some large zip ties. For comfort reasons I wrapped the belt in a manner that would allow it to stay flush as it wrapped around my hand. Fits better than OJ's glove...much better!    I've got a few more to post but I have to get to work soon so I'll post them tomorrow. Let me know what you think!!! THANKS to BTFDAVID and GREG ANDREW!!! Last edited by jorluivil; 09-16-2010 at 11:05 PM. |
|
|
|
|
09-17-2010, 10:50 AM
|
#92 |
|
.
Join Date: May 2010
Posts: 1,155
|
getting ready for lobster season
i made a davit out of 1 1/2" EMT (Electrical Metal Tubing)
to make hoop net pulling easier. the tubing fits the molded fishing pole holder on the outback nicely. i have not tested this yet and not sure if the leverage and weight from the net will make me tip or not??? will see 
__________________

|
|
|
|
|
09-17-2010, 05:45 PM
|
#93 |
|
Senior Member
Join Date: Nov 2009
Posts: 149
|
I do autobody and paint and use these stand's to work on part's or paint with and use them for my OK Malibu two xl and work perfect it adjust with the chain's and fold's right and light weight just thought i'd share since it can be very useful.
http://www.tooltopia.com/astro-pneumatic-557003.aspx |
|
|
|
|
09-17-2010, 06:32 PM
|
#94 | |
|
Senior Member
Join Date: Aug 2010
Posts: 344
|
Quote:
|
|
|
|
|
|
09-24-2010, 10:09 PM
|
#95 |
|
Banned
Join Date: Sep 2010
Posts: 36
|
For wet mounting using the black pipe section and rubber cap;
I had to install it in a fairly curved and asymetrical part of my yak, and I neither have the tools nor patience to file the pipe down properly, so I used marine putty. Took the whole tube to make this...make sure to rough up the pipe very nicely, and to put on more than you need. Set it and put as much pressure as you can on it, let it cure. It will -NOT- hold to the yak plastic so after it cures pop it off and use marine poly glue to get it secure...use glue inside, outside and at the putty/pipe line so it holds and nothing leaks. (if you have it, silicone the threads to further reduce leak)   I also used some marine goop and a 2" section of PVC to mount my submerge type transducer under the rubber cap, forgot to take a pic. |
|
|
|
|
09-24-2010, 10:12 PM
|
#96 |
|
Banned
Join Date: Sep 2010
Posts: 36
|
Also
I use some teflon dry lubricant on the plastic threading on yak hatch covers, and the plastic hand pump....it made a HUGE difference in the pump. Smooth as silk now, takes no effort to empty out my in-yak livewell |
|
|
|
|
09-26-2010, 05:18 PM
|
#97 |
|
Senior Member
Join Date: Apr 2010
Posts: 6,855
|
MY LATEST LOBSTER SEASON INNOVATION
I had this LED saved to install on my boat, boats gone so time to install it on the Ole Kayaki. Being that it was going to face me I decided to install it mostly downward, it's tuff to stare at after a minute or two. The labor hours have actually turned into days.......and still not done
|
|
|
|
|
09-26-2010, 06:02 PM
|
#98 | |
|
.......
Join Date: Jan 2009
Posts: 1,509
|
Quote:
I built and use a boom on my FND..   There's a couple of things I'd suggest. You don't want the boom leaning out over the water but instead even with the edge of your kayak. If it's out too far it will actually try to pull you over, and you could easily roll your yak with the setup you have shown. The deal with the boom is that you can use your weight to your advantage and pull down rather then lift up. Which means you can put more torque on it and move the net faster through the water. The closer to your body the pulley or block is the more advantage you have. Also you want the net as close to straight under you as possible, so it does not pull you around. The boom should be fixed so it can't move around or turn, and as you want that block right where it gives you the most advantage. Like I said mines right even with the edge of my kayak. That keeps the rope from rubbing too hard on the side of the yak but gives me maximum toque or pull speed. I find when pulling with my boom there is a point where my lanyard float clears the side of the yak, and then I pull the last pull with my right hand down while guiding the net upward around the side of the yak with my left hand. It sounds complicated but it's not. Another issue is that you want the boom high enough that when your lanyard float hits the block the net is completely out of the water, other wise bugs can flip up and out of the net while your trying to get the rope off the block. On the same theme you want an open block or pulley so it's easy to get the line off and on. I made mine fixed so it will not turn or twist with a extra wide opening.  It's also nice to have some kind of light on it.  I would be very concerned that your setup might pull the kayak over or worse break out the rod holder. I tried two setups that failed before I built the base for mine.  You'll be amazed how much torque a boom like that puts on your yak or on a holder. Jim |
|
|
|
|
|
09-27-2010, 03:47 PM
|
#99 |
|
.
Join Date: May 2010
Posts: 1,155
|
THANKS Jim the EMT boom is scrapped. i need to get some hoop time on the kayak and steal your design
  . .nice work by the way!!!
__________________
|
|
|
|
|
09-28-2010, 11:43 PM
|
#100 |
|
Senior Member
Join Date: Mar 2005
Posts: 116
|
I wanted to increase the dry storage under the center hatch, so I installed a raised floorboard in my Hobie. It extends from the center support to the seat scupper posts. The tray holders mounted on the sides of the hull keep the floorboard from moving laterally.
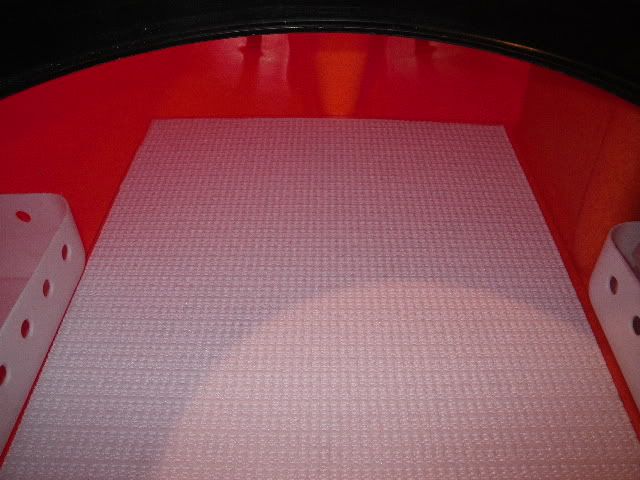 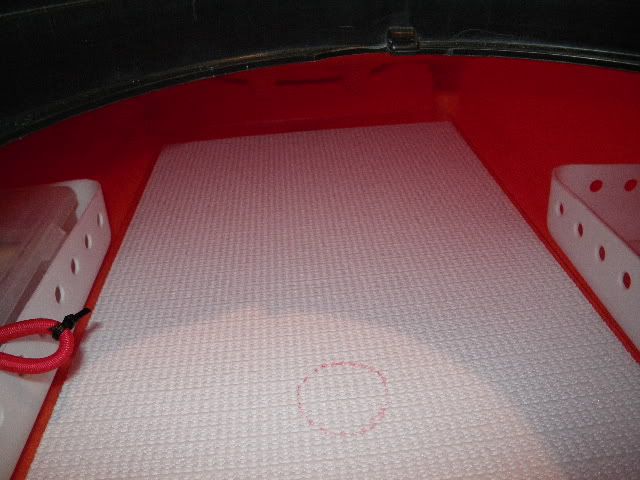  It is made out of 1/16" polycarbonate and is very light, yet strong. I covered it with a non-slip, rubber drawer liner. The red circle is where I put an emergency knockout, in case it is necessary to pump water out of the hull. A spade drill bit was used to create the knockout. It was then cemented to another piece of polycarbonate and reattached to the floorboard from the bottom side. A dab of goop on each corner holds the plug in place. 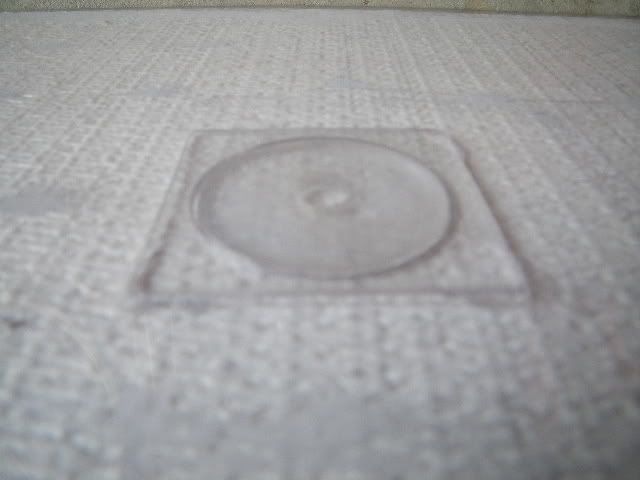 To provide support, I split a 3" section of pool noodle lengthwise and gooped the 2 pieces down the centerline of the hull, at each end of the floorboard. This provides support and allows residual water to flow through. 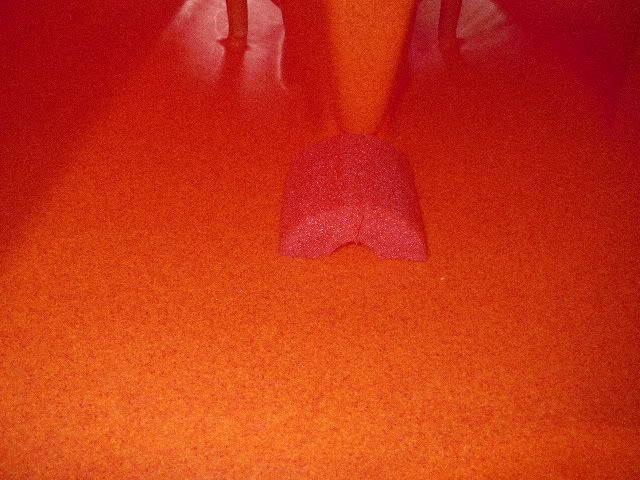 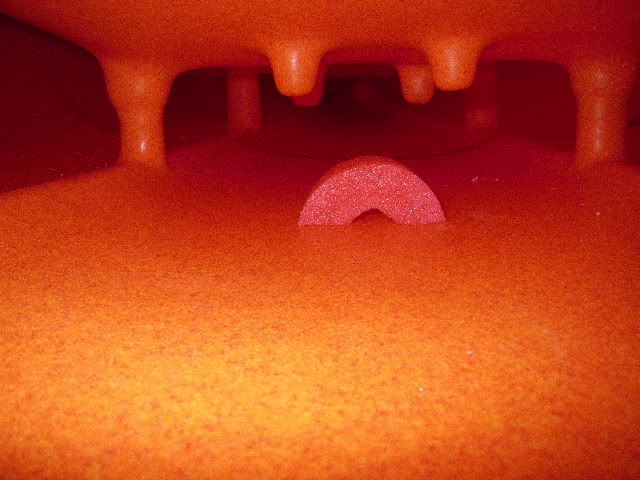
Last edited by fongman; 09-29-2010 at 06:32 PM. |
|
|
|
|
| Tags |
| kayak fishing inovations, kayak rigging ideas |
|
|


 Linear Mode

