
 |
|
|||||||
| Home | Forum | Online Store | Information | LJ Webcam | Gallery | Register | FAQ | Community | Calendar | Today's Posts | Search |
 |
|
|
Thread Tools | Display Modes |
|
|
#101 |
|
Olivenhain Bob
Join Date: May 2008
Location: Olivenhain, CA
Posts: 1,121
|
I built a similar, (although less elegant) tray for my Revo. I used the lid from a plastic storage container. This lid is approximately 25" x 17" with a 1" lip on the outside edges. To get it to fit through the hatch, I cut it in half. Before shoving the pieces into the kayak, I drilled a few holes on the cut edges. Once the plastic was in place, I ran some zip ties through the holes to reassemble the lid. To finish off, I created a "bulkhead" fore and aft using noodles in hopes that I would be able to keep my gear from sliding out of reach. My solution is not perfect. The lid slides around a bit and stuff still sometimes slides past the noodle bulkheads. Using your idea of attaching noodle spacers to the bottom of my tray may help keep the thing from sliding around. I know that there is a way to create a better bulkhead which will prevent gear from escaping. I will be thinking about this. I like your idea. Raising the edges somehow would make it even better. You might also consider drilling some drain holes right under the hatch area since we all know that Hobie hatches sometimes let in a little water when they are opened. Bob |
|
|

|
|
|
#102 |
|
Rookie of the Month Club
Join Date: Nov 2008
Location: Mira Mesa
Posts: 483
|
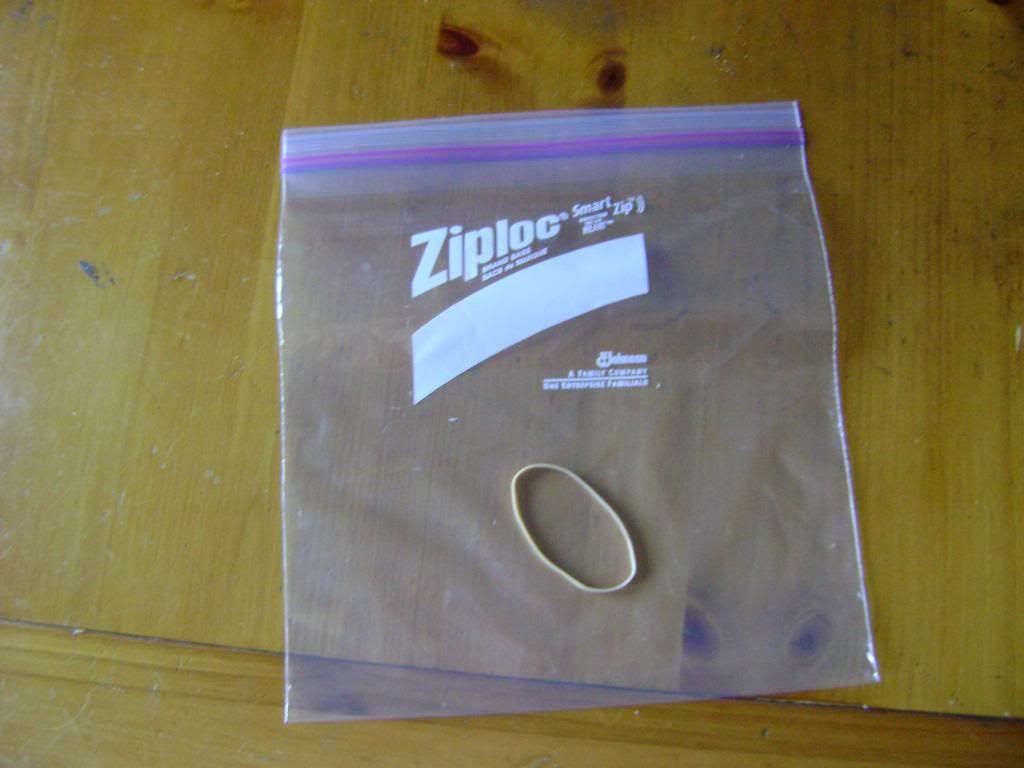
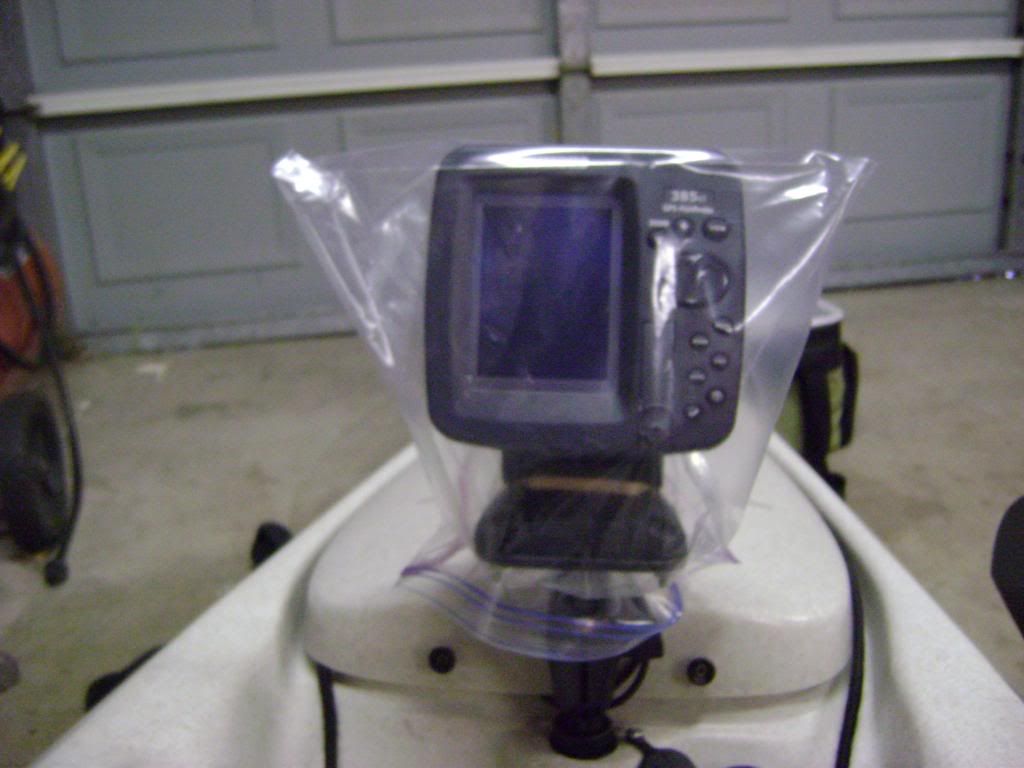
Just my 2 cents, and it actually costs 2 cents. A good way to keep your FF clean and dry the whole time on the water and for those surfy days. The good thing is you can actually use the buttons and read it still with the ziplock on it.
__________________
they are getting bigger.... 
|
|
|

|
|
|
#103 |
|
Senior Member
Join Date: Aug 2010
Posts: 344
|
|
|
|

|
|
|
#104 | |
|
.......
Join Date: Jan 2009
Posts: 1,509
|
Quote:
Like I said I had to do mine three times before it worked, hoop a while and you'll work out what you need.. Good luck!!! Jim |
|
|
|

|
|
|
#105 |
|
.
Join Date: May 2010
Posts: 1,155
|
i appreciate it Jim
the EMT was literally scrap. so no loss there. i modified the pulley block so the rope can be slipped over the pulley without threading it through, similar to yours. the block can be reused when i redesign something similar to the Jim Day hoop net davit. but im sure it will not be as nice as yours.
__________________

|
|
|

|
|
|
#106 | ||
|
Senior Member
Join Date: Mar 2005
Posts: 116
|
Quote:
Quote:
The polycarbonate I used is only a 1/16" thick, so I don't want to weaken it with holes. I have a sponge to soak up any water. |
||
|
|

|
|
|
#107 |
|
Member
Join Date: May 2010
Posts: 60
|
Recently got myself an ocean worthy kayak (hobie), which means it 2x as heavy as my OK frenzy, and a pig to put on the roof of my car. After googling for a while, I decided to go for a home brew version of the Thule Outrigger, which seemed a little pricey.
Trip to my local Marshalls Hardware in San Diego yielded some appropriate steel.  Sanded and sprayed with some enamel paint.  Fits almost perfectly into the Thule load bar  Covered with a pool noodle, duct tape, and a tennis ball to prevent brain injury  Its now manageable to load my kayak alone. Lift nose onto bar, then lift stern onto rack. I actually made a second, so once its on hull down, its easy to flip it upside down without leaning over the car. Reverse the process for unloading obviously. I pull them out and put them in the car once loaded/unloaded. Cost was about $10 per. |
|
|

|
|
|
#108 |
|
Senior Member
Join Date: Jun 2010
Location: Alhambra
Posts: 506
|
over the top kayak rack
i wanted to share with you guys my kayak rack. it may be over the top for some, but for others i hope that you enjoy it.
i used some steel galvanized fence post and some aluminum tubing, which my neighbor was tossing out when he was cleaning out his garage, with brackets to assemble this. it has wheels so that i can move it around in my garage when i need to get behind it, or to wheel it out to load up in my car. wheels really do come in handy. i also attached some hulley rollers from yakima to the cross bar so that i can easily roll up the kayak onto it. i found the rollers on craigslist for $50. underneath i covered the bars with hot water insulation from home depot so that i could place my poles onto it. i think it is better than stashing them into a corner in the garage. hope that you guys like the pictures. |
|
|

|
|
|
#109 |
|
Senior Member
Join Date: Aug 2008
Location: Long Beach
Posts: 427
|
Very Nice! I want one!

|
|
|

|
|
|
#110 |
|
Senior Member
Join Date: Aug 2010
Posts: 344
|
|
|
|

|
|
|
#111 | |
|
Senior Member
Join Date: Mar 2010
Location: San Diego
Posts: 2,385
|
Great Idea Here
Quote:
|
|
|
|

|
|
|
#112 |
|
Senior Member
Join Date: Mar 2010
Location: San Diego
Posts: 2,385
|
Milk Crate and others
Using something I saw Fongman do I made this Milk Crate
 Then when you buy a Kayak from Jim Sammons you get some of his great creations that come with it.  Mounting the Transducer with a make shift bracket. I noticed in the photo it was a little off center so I corrected that after the photo was taken. I'm just about ready to take her out for the first time.  I love this stuff. |
|
|

|
|
|
#113 |
|
Senior Member
Join Date: Aug 2010
Posts: 344
|
|
|
|

|
|
|
#114 |
|
Olivenhain Bob
Join Date: May 2008
Location: Olivenhain, CA
Posts: 1,121
|
Jimmy, that rig looks great. Where will you put your bait tank, in the crate? One thing that Fongman did which you might consider is to somehow move the trolling "V' forward a bit. If you have it too far back, you will have a tough time watching the rod tips, not to mention getting your hand on the rod quick enough to deal with a soft bite.
It looks like you could move the V about six inches forward by building a mounting bracket that attaches to the crate so it positions the rod holders right behind your seat. An even better way to handle things would be to create a rig that moves the rod holders to where they are about even with your shoulders. I have experimented with this and found that there is a sweet spot for the rod holder location that makes it easy to watch the rods without getting in the way of paddling. You can't to this with a "V" setup but using ABS or PVC pipe, you can create individual rod holders that mount to the crate, extend forward to the appropriate place. At the forward end they will need to be secured to the yakl with straps to make sure everything stays where it is supposed to. If you are like me, you will find that tweaking your setup until it works perfectly for the way you like to do things is almost as much fun as going fishing. It gets even better when your idea works perfectly and helps you catch a trophy fish. Bob |
|
|

|
|
|
#115 | |
|
Senior Member
Join Date: Mar 2010
Location: San Diego
Posts: 2,385
|
Quote:
As for the V rod holder that's a temporary setup until I can install some of the New Scotty Rocket Launcher Rod Holders. Jim Sammons showed me some that he has and they are very nice. First I have to find a place that carries them. If not those I'll get the Ram mount rocket launchers. Believe me, I will be tweaking thing often to find what does work perfectly for me. One thing I am still thinking about is the Fishfinder, I may remove that from the cutting board plate that was made and attach the base directly to the Kayak and a little lower. I am truly loving this whole kayak fishing and rigging thing. |
|
|
|

|
|
|
#116 |
|
Senior Member
Join Date: Apr 2010
Posts: 6,856
|
Glowsticks
So I've seen these glow sticks at Home Depot for a few months now and finally decided to buy some and see if I could modify them for hooping.
First reason to buy these is because they come with free battery replacements for life, just pay shipping and handling....I know, I know that's not exactly free but it only cost $15 to replace the batteries on 6 glow sticks. Lifegear also sends you a prepaid envelope to return the old batteries for proper disposal. Not sure how many of you know this but it is illegal to throw batteries in the trash. The last time I bought batteries for my Promar sticks I bought them at Walmart, they sell a similar set of batteries for $5.00+tax, $6 X 6 packs= $36........50% savings by going with the Lifegear brand. Second reason to buy these is because they come with three way lighting. Orange solid, orange flashing, and a flashlight at the tip, this part of the light can be reversed and used as a solid white white on the glow stick. First thing I did was cut off the whistle that sits at the bottom of the glow stick, you can leave it on but it just makes the glow stick that much longer and gets in the way. Once you cutoff the whistle you can attach it to your PFD, hopefully you'll never need it but it's good to have one. Next thing was to Goop three areas of the glow stick, you want to Goop the part that has the flashlight, the on/off button and the area where the two pieces come together. Because Goop is slightly flexible once it dries it still allows you to use the on/off button after the Goop dries. About the only downfall to these is that they have a one hour timer on them, I looked at the circuit board to see if I could bypass the time but I couldn't figure out which part of it was the timer. I figured this out the hard way, three of the glow sticks turned off minutes apart from each other while I was hopping. The way to avoid this is to simply turn them off and on each time you pull your net(s). However, because they do have a timer you'll never have to worry about them turning on after you put them away, this happens to my Promar sticks a lot, the copper contact touches the battery and.......you know the rest. Promar makes a god product but if you can get something for less and make it work by making slight modifications why not? You can get three of these for just under $8, that's under $3 each compared to a price of $6 for each for the Promars. Last edited by jorluivil; 11-30-2010 at 03:52 AM. |
|
|

|
|
|
#117 |
|
Team Keine Zugehörigkeit
Join Date: Nov 2010
Location: Way out there
Posts: 2,854
|
while I was out fishing on black Friday I locked my cart up to the lifeguard tower and at the end of the day when I got out some asshole came along and busted off one wheel.So i went to HF and got new wheels. Here's what I did.
old wheel removed from cartold wheel1.jpg old axle removed from old wheelold axel.jpg old axle in new wheel new wheel + axel.jpg fits perfectcompelete new wheel.jpg repeat for the other side all done.jpg While at Hf I picked up a box of snap clips 12 pcs for $5 http://www.harborfreight.com/12-piec...set-67563.html used the snap clips to leash everything down and the box became a tackle box box1.jpg fits perfect in the side pocketbox in yak.jpg I also drilled a hole in a rib inside the hatch and tied the hatch to the inside of the yak added a loop and a snap clip to keep my dry bag close inside.hatch.jpg very productive day for me.
__________________
 Não alimente os trolls------------Don't feed the trolls---------------インタネット荒らしを無視しろ 
|
|
|

|
|
|
#118 | |
|
Junior
Join Date: Jun 2010
Posts: 24
|
Quote:
|
|
|
|

|
|
|
#119 |
|
Paddle, Fish, Repeat
Join Date: Jan 2010
Location: Salt Lake City, UT
Posts: 26
|
Trailer Version 2.0
While waiting for the snow to melt, I try to pass the time by reading this forum and especially this thread. I posted a while back that I bought a used trailer and used it last summer. It was great other than I could only carry 2 kayaks and a cargo box. Here is a pic of my original setup. It was a rack setup on the bunks of the trailer.
I wanted to be able to put bikes and camping gear in addition to the 2 kayaks. I also wanted to be able convert it to a utility trailer if I wanted to go to home depot and pick up some wood. I decided I would need a second level to the trailer to hold all that. I removed the bunks and added floor to the frame of the trailer. I looked into some kayak racks that are designed for small boat trailers. They ran about $250 to $400. More than I wanted to spend. I found a ladder rack to be the solution. I bought one for $60 on ebay. It took me a few hours to figure out the best way to install this onto my trailer. This is the end result. I put the kayaks on today to make sure it all fits. I added some iron piping to the bottom for my racks to hook onto. SAM_0508.jpg SAM_0512.jpg SAM_0511.jpg Room for the bikes in the middle of the top rack SAM_0513.jpg SAM_0514.jpg I bolted the ladder rack to the frame of the trailer. I think it turned out pretty good and can't wait try it out this summer. When it is all said and done, I spent about $330 for this set up. As always if you have any other ideas please share them! Jeff
__________________
 Paddle, Fish, Repeat. Last edited by senojmj; 02-09-2011 at 01:54 PM. |
|
|

|
|
|
#120 |
|
CEO of Team Roby
Join Date: Sep 2010
Posts: 905
|
This isn't really an innovation, but I thought it might help someone. I know the wet mount has been around....
I first mounted my transducer attached to the sail mast of my Hobie Revolution. I zip tied it to the mast and then just added water. It worked, but I didn't like the water in the yak... I decided to contain the water in some foam. I bought a foam roller for 10 bucks or so at walmart. After I cut the piece I needed, I jammed it in to the hull of the kayak for extra floatation. Or you can cut and sell more pieces to your non-Hobie friends for $10 a piece. You also can frame the pic of the hot chick on your garage wall. 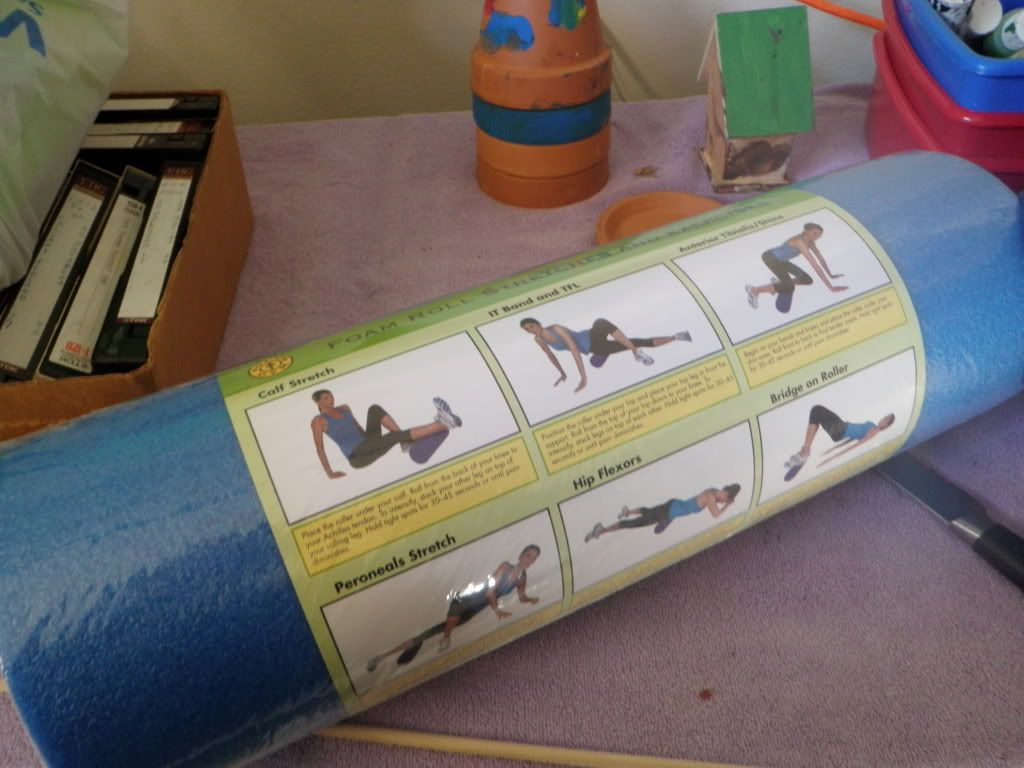 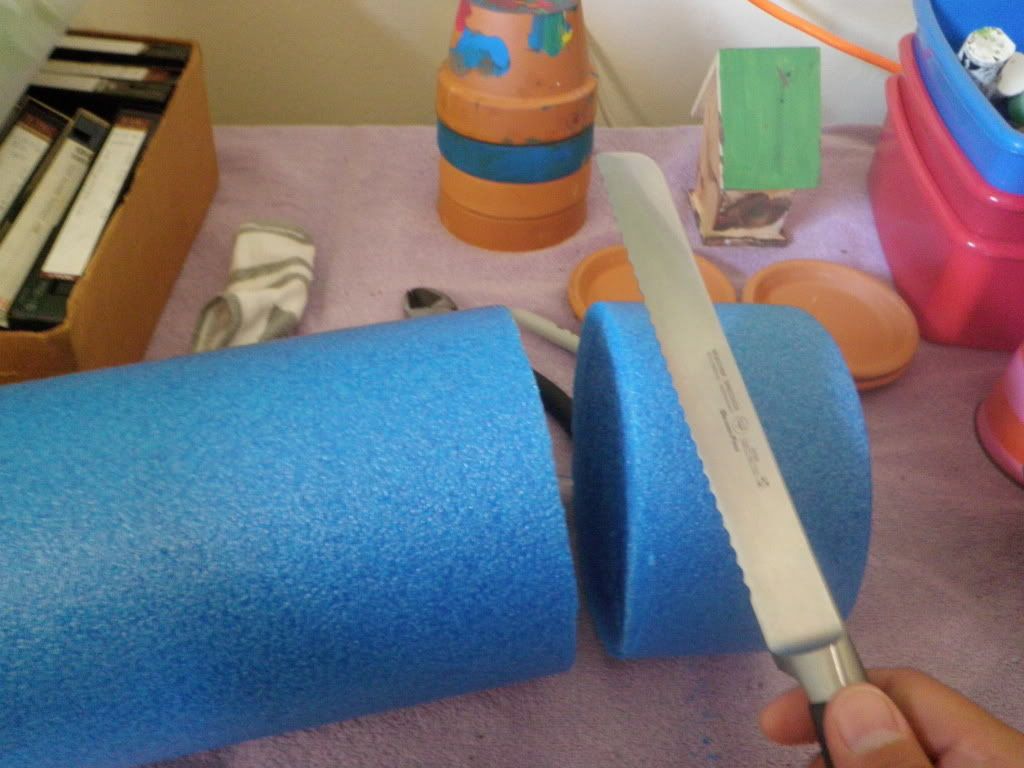 Cut the transducer section smaller than the actual transducer so the fit is snug. 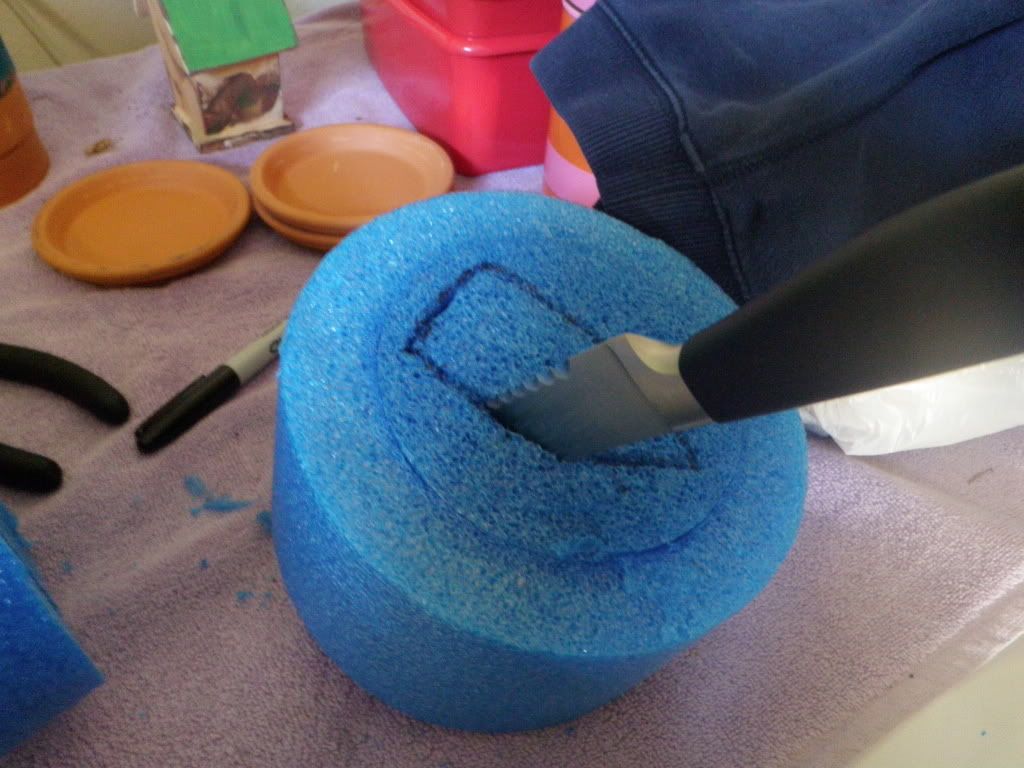 Take time to shape the foam to match the kayak hull. 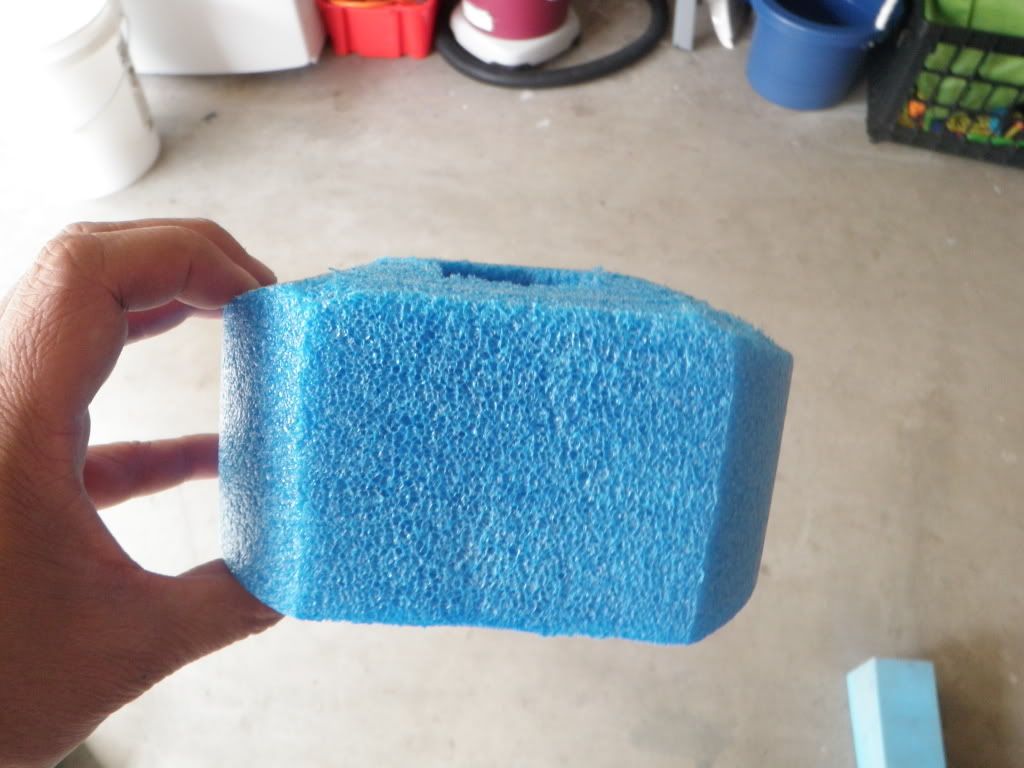 I gooped the foam and just added water. The transducer fits in snug and will not come out even if I flip the kayak and shake it, "like a Polaroid camera." I add a water saturated sponge on top just in case the ducer wants to move, but I also use the sponge when I'm done to take out any water from inside the foam. 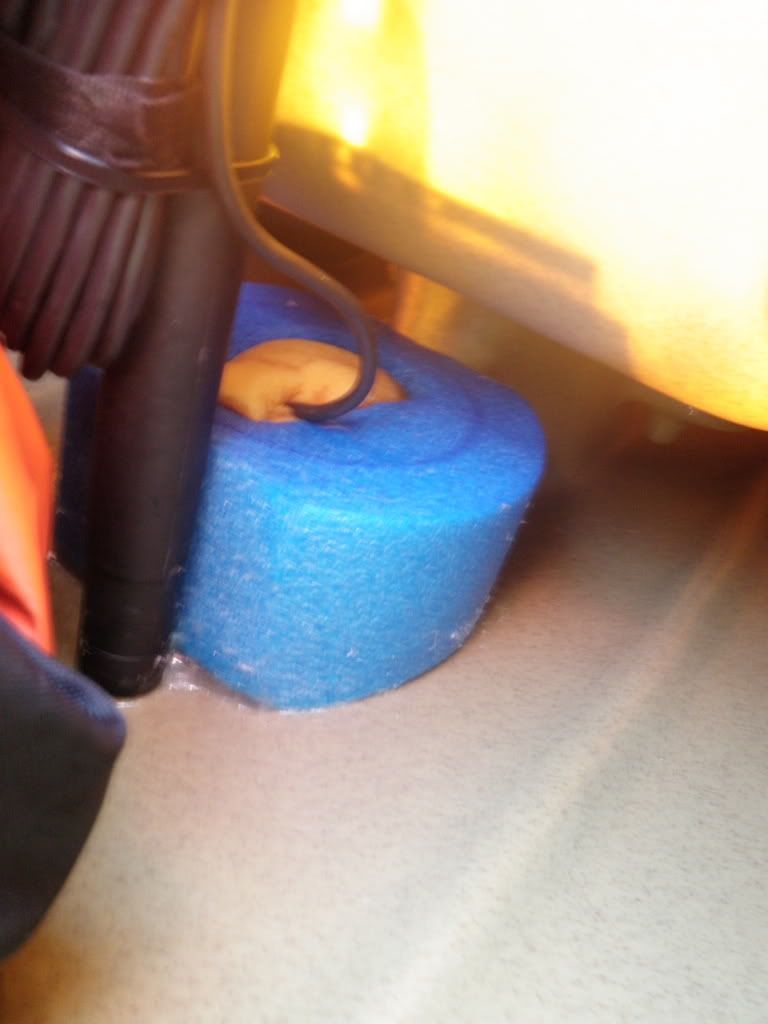 I have taken it out several times and it works just fine. The water doesn't come out either when I load and unload the yak. If I was to do it over again I would cut the foam at 3 inches or so. I know this wetmount topic is overdone, but just wanted to add. |
|
|

|
 |
| Tags |
| kayak fishing inovations, kayak rigging ideas |
|
|