|
|||||||
| Home | Forum | Online Store | Information | LJ Webcam | Gallery | Register | FAQ | Community | Calendar | Today's Posts | Search |
 |
|
|
Thread Tools | Display Modes |
|
|
 03-24-2010, 01:17 PM
|
#1 |
|
Member

Join Date: Jan 2010
Location: Northern Virginia
Posts: 50
|
never used grease.....i vote water. i made a version of bob's wet mount and love it. it has worked very well and you never will have to worry about the mess you could have. i have the 2010 570 hummingbird. i have been out on 3 full day trips and love my readings.
water = no bubbles......grease i am not sure about. plus++++++ water is free! |

|

|
|
03-31-2010, 02:24 PM
|
#2 |
|
Senior Member
Join Date: Mar 2005
Posts: 116
|
Hobie Adventure Mods
The wellnuts/screws on a Hobie Adventure can easily be used as mounting points. I used the ones near the front hatch to fasten a polycarbonate shelf for my fishfinder base. When I changed from a Humminbird to Garmin, no big deal; I just drilled new holes. Polycarbonate is very strong and will not crack like acrylic.
 I made aluminum mounting plates for the ones behind the seat. These are used to support the pvc rodholder I made. The plate provides front-to-back stability while the V construction provides side-to-side stability. Other features that I like of this rodholders design is that they are angled at about 45 degrees, they have a low center of gravity, the mass is kept close to the centerline of the kayak, and the rods are within easy reach. In addition, they point slightly forward or back, depending upon which direction they are mounted. When pointed forward, the tips of the rods can be seen without much effort. 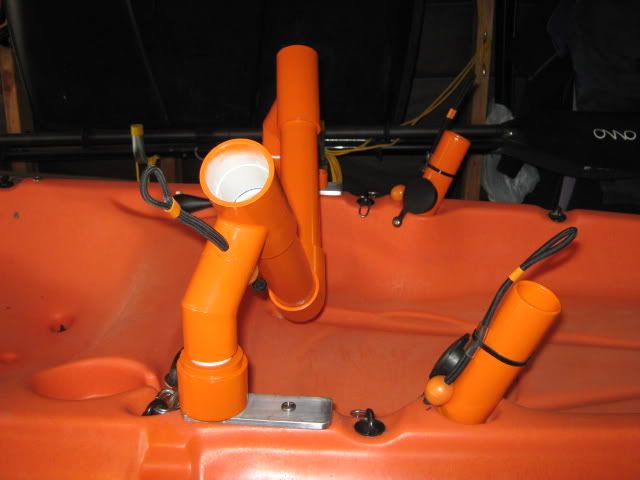  I also built some extension tubes for the builtin rodholders. I use these for my bass rods. Electrician tape wrapped over one layer of corktape on 1 1/4" pvc creates a snug fit. Instead of using lanyards to secure the rods, the bungies are looped over the reel handles. |
|
|
|
|
03-31-2010, 02:34 PM
|
#3 |
|
Olivenhain Bob

Join Date: May 2008
Location: Olivenhain, CA
Posts: 1,121
|
Very cool Fongman. I really like the bungee loops on the rod holders. I will be adding them to all of my rod holders. What a great idea.
Can you post a photo that details that design? What did you use to attach the bungee cord together to make the loop? Bob |
|
|
|
|
03-31-2010, 02:41 PM
|
#4 | |
|
Senior Member
Join Date: Mar 2005
Posts: 116
|
Quote:
Those are pre-made for tarps. You can get them at any DIY store. I just shortened the ones on the extenders and slipped a 1" piece of plastic tubing over it so I could attach the zip tie. |
|
|
|
|
|
04-07-2010, 08:31 PM
|
#5 |
|
Junior

Join Date: Nov 2009
Location: Orange County
Posts: 28
|
My vote goes to Jim....
|
|
|
|
|
04-20-2010, 02:24 PM
|
#6 |
|
Senior Member

Join Date: May 2007
Location: S.D.
Posts: 133
|
my plan is bait tank/ rod holder, rod holder and the pipe transducer mount. i have found a scrap 13 inch drain pipe about 12in long when they were doing the sewage repair at my work, that i will be using as a bait tank with built in rod holder and make a contraption rod holder that will use the existing molded rod hoder on my recently bought revo. the bait tank will be kinda like the hobie bait tank, i am thinking may be 5-6 rod holder n built in batery holder too. and i thank everyone here for the great ideas and insparation. right now i am gathering the material i might take me a week to finish the project due a little 1yr todler running around that touches everithing she see .
|
|
|
|
|
07-29-2010, 09:57 AM
|
#7 |
|
Noob Supreme
Join Date: Jul 2010
Location: Cherry Valley, CA
Posts: 12
|
I don't know if this qualifies--
I got rid of my Jeep and got a new truck, my Yakimal towers wouldn't fit, nor did I want to spend another $500 bucks on Yakimal's truck bed tower system. Soooooo I bought a $150 dollar ladder rack. But.. I didn't want to drill holes in my truck. So I welded two pieces of pipe onto the side of each bracket-- and got some "J" bolts. The "J" bolts run through the pipe and down along side the truck's rail-- the J part hooks under the rail and then I crank a bolt down to tighten the brackets down. The bar at the top of the rack puts more pressure against the brackets (horizontally) at the bottom. They aren't going anywhere. To top it off takes me about 10 minutes to remove the whole thing! Then I just installed my old Yakimal Hullyrollers and Mako Kayak saddles via stainless steel hose clamps. So for a total of about $200 bucks I got a nice solid kayak rack.     The yellow yak is my wife's Navigator the white yak is my Fish'n'Dive Haven't figured out how to transport my son's Cobra Explorer... any Ideas? |
|
|
|
|
07-29-2010, 10:17 AM
|
#8 | |
|
Olivenhain Bob
Join Date: May 2008
Location: Olivenhain, CA
Posts: 1,121
|
Quote:
Bob |
|
|
|
|
|
08-03-2010, 08:13 AM
|
#9 |
|
Rum Pirate

Join Date: Mar 2010
Location: Wilds of Mira Mesa
Posts: 388
|
I have a shell on my 2009 f150. I have a 6ft bed and put my pro angler in the back. The shell has a yakama rack on it for two more on the top.
|
|
|
|
|
08-03-2010, 08:30 AM
|
#10 |
|
Senior Member
Join Date: May 2007
Location: S.D.
Posts: 133
|
RACK?
check out harbor freight and ask for the truck bed extender the connects to your square hitch receiver it only cost me 35$ its quisk and easy to removed/install
|
|
|
|
|
08-03-2010, 09:33 AM
|
#11 |
|
Noob Supreme
Join Date: Jul 2010
Location: Cherry Valley, CA
Posts: 12
|
I like both idea'ers--- thanks
I'll post pictures asap. Thanks again. |
|
|
|
|
09-17-2010, 10:50 AM
|
#12 |
|
.

Join Date: May 2010
Posts: 1,155
|
getting ready for lobster season
i made a davit out of 1 1/2" EMT (Electrical Metal Tubing)
to make hoop net pulling easier. the tubing fits the molded fishing pole holder on the outback nicely. i have not tested this yet and not sure if the leverage and weight from the net will make me tip or not??? will see 
__________________

|
|
|
|
|
09-17-2010, 05:45 PM
|
#13 |
|
Senior Member
Join Date: Nov 2009
Posts: 149
|
I do autobody and paint and use these stand's to work on part's or paint with and use them for my OK Malibu two xl and work perfect it adjust with the chain's and fold's right and light weight just thought i'd share since it can be very useful.
http://www.tooltopia.com/astro-pneumatic-557003.aspx |
|
|
|
|
09-17-2010, 06:32 PM
|
#14 | |
|
Senior Member

Join Date: Aug 2010
Posts: 344
|
Quote:
|
|
|
|
|
|
09-24-2010, 10:09 PM
|
#15 |
|
Banned
Join Date: Sep 2010
Posts: 36
|
For wet mounting using the black pipe section and rubber cap;
I had to install it in a fairly curved and asymetrical part of my yak, and I neither have the tools nor patience to file the pipe down properly, so I used marine putty. Took the whole tube to make this...make sure to rough up the pipe very nicely, and to put on more than you need. Set it and put as much pressure as you can on it, let it cure. It will -NOT- hold to the yak plastic so after it cures pop it off and use marine poly glue to get it secure...use glue inside, outside and at the putty/pipe line so it holds and nothing leaks. (if you have it, silicone the threads to further reduce leak)   I also used some marine goop and a 2" section of PVC to mount my submerge type transducer under the rubber cap, forgot to take a pic. |
|
|
|
|
09-26-2010, 06:02 PM
|
#16 | |
|
.......

Join Date: Jan 2009
Posts: 1,509
|
Quote:
I built and use a boom on my FND..   There's a couple of things I'd suggest. You don't want the boom leaning out over the water but instead even with the edge of your kayak. If it's out too far it will actually try to pull you over, and you could easily roll your yak with the setup you have shown. The deal with the boom is that you can use your weight to your advantage and pull down rather then lift up. Which means you can put more torque on it and move the net faster through the water. The closer to your body the pulley or block is the more advantage you have. Also you want the net as close to straight under you as possible, so it does not pull you around. The boom should be fixed so it can't move around or turn, and as you want that block right where it gives you the most advantage. Like I said mines right even with the edge of my kayak. That keeps the rope from rubbing too hard on the side of the yak but gives me maximum toque or pull speed. I find when pulling with my boom there is a point where my lanyard float clears the side of the yak, and then I pull the last pull with my right hand down while guiding the net upward around the side of the yak with my left hand. It sounds complicated but it's not. Another issue is that you want the boom high enough that when your lanyard float hits the block the net is completely out of the water, other wise bugs can flip up and out of the net while your trying to get the rope off the block. On the same theme you want an open block or pulley so it's easy to get the line off and on. I made mine fixed so it will not turn or twist with a extra wide opening.  It's also nice to have some kind of light on it.  I would be very concerned that your setup might pull the kayak over or worse break out the rod holder. I tried two setups that failed before I built the base for mine.  You'll be amazed how much torque a boom like that puts on your yak or on a holder. Jim |
|
|
|
|
|
09-27-2010, 03:47 PM
|
#17 |
|
.
Join Date: May 2010
Posts: 1,155
|
THANKS Jim the EMT boom is scrapped. i need to get some hoop time on the kayak and steal your design
  . .nice work by the way!!!
__________________
|
|
|
|
|
09-28-2010, 11:43 PM
|
#18 |
|
Senior Member
Join Date: Mar 2005
Posts: 116
|
I wanted to increase the dry storage under the center hatch, so I installed a raised floorboard in my Hobie. It extends from the center support to the seat scupper posts. The tray holders mounted on the sides of the hull keep the floorboard from moving laterally.
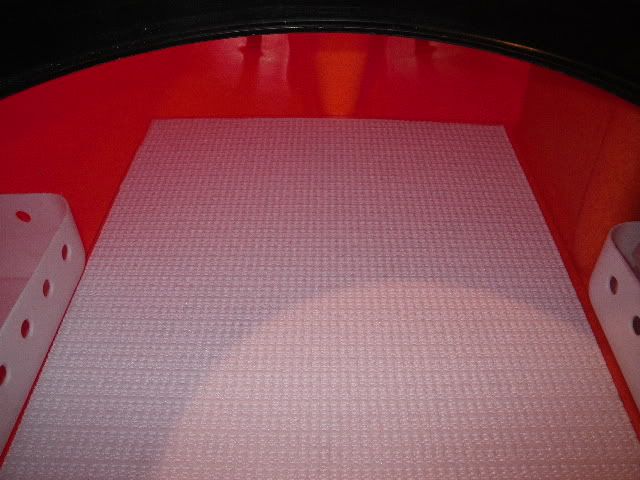 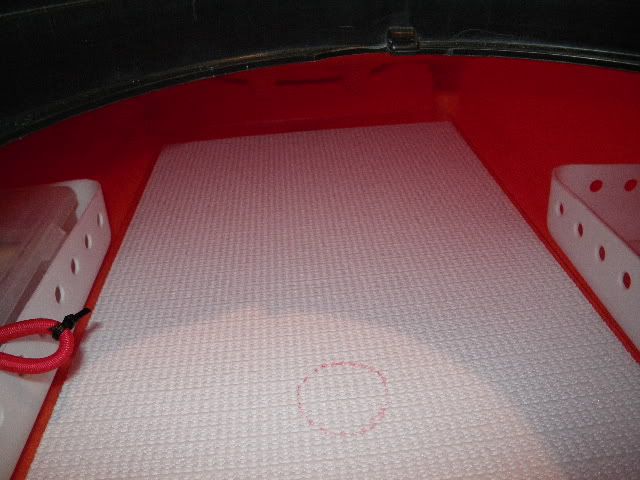  It is made out of 1/16" polycarbonate and is very light, yet strong. I covered it with a non-slip, rubber drawer liner. The red circle is where I put an emergency knockout, in case it is necessary to pump water out of the hull. A spade drill bit was used to create the knockout. It was then cemented to another piece of polycarbonate and reattached to the floorboard from the bottom side. A dab of goop on each corner holds the plug in place. 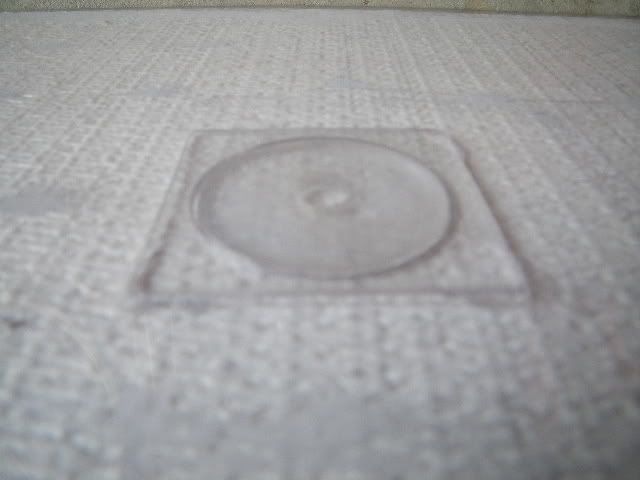 To provide support, I split a 3" section of pool noodle lengthwise and gooped the 2 pieces down the centerline of the hull, at each end of the floorboard. This provides support and allows residual water to flow through. 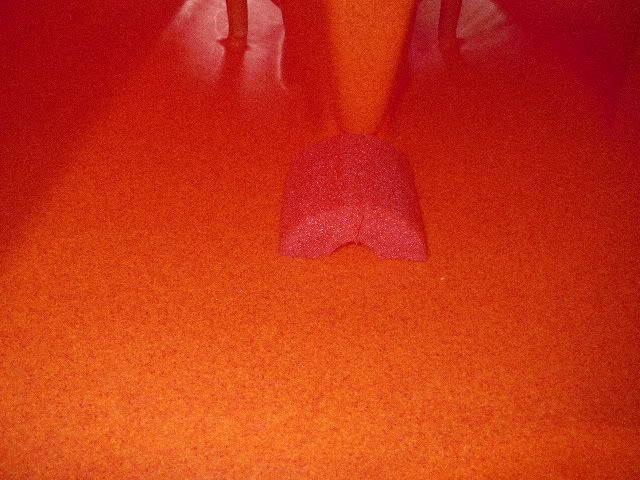 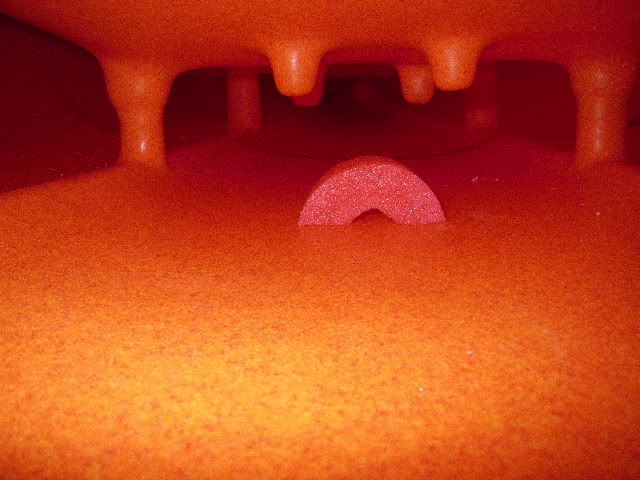
Last edited by fongman; 09-29-2010 at 06:32 PM. |
|
|
|
|
09-29-2010, 03:27 PM
|
#19 | |
|
.......
Join Date: Jan 2009
Posts: 1,509
|
Quote:
Like I said I had to do mine three times before it worked, hoop a while and you'll work out what you need.. Good luck!!! Jim |
|
|
|
|
|
11-09-2010, 02:46 PM
|
#20 | |
|
Senior Member

Join Date: Mar 2010
Location: San Diego
Posts: 2,385
|
Great Idea Here
Quote:
|
|
|
|
|
|
| Tags |
| kayak fishing inovations, kayak rigging ideas |
|
|


 Hybrid Mode
